

Packed cell volume (PCV) is a measurement of the proportion of blood that is made up of red blood cells and it is expressed as a percentage. PCV is interpreted alongside total solids (TS) and is a quick and simple way for you to assess your patient during a diagnostic workup.
Equipment
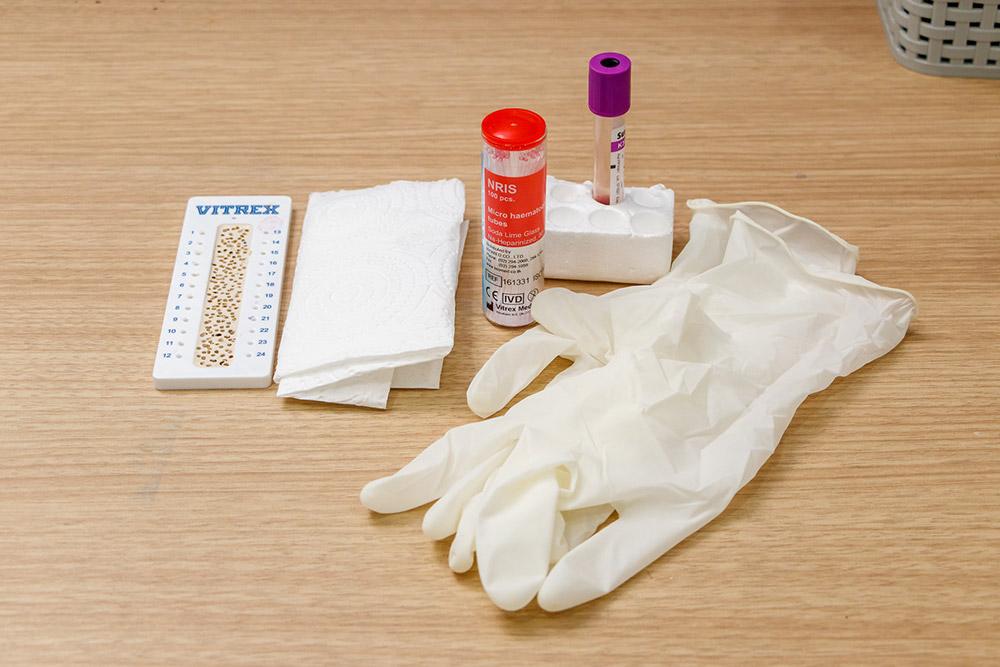
You will need the following equipment:
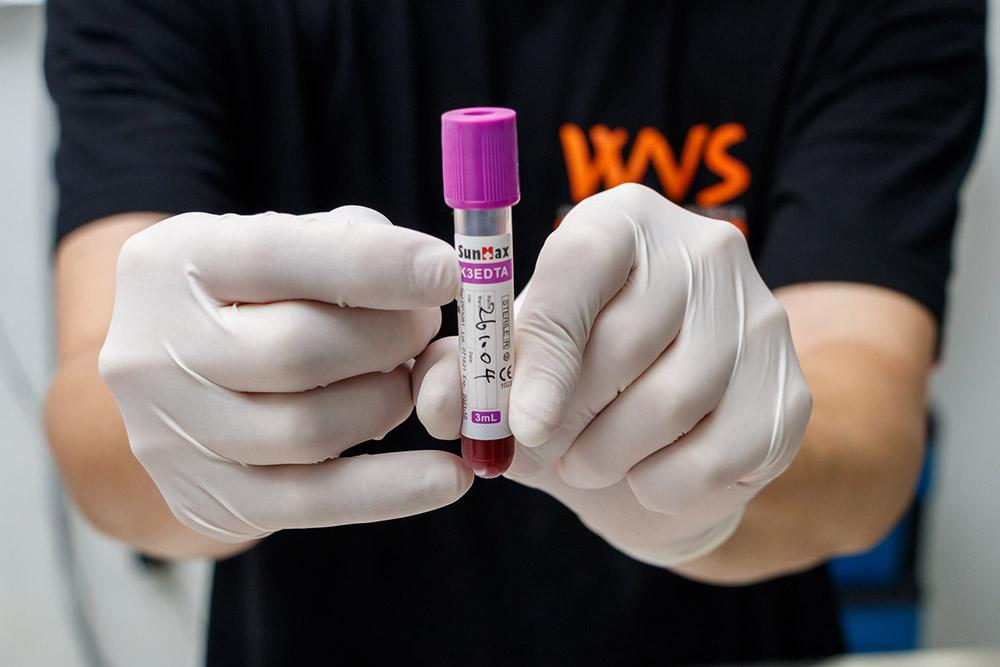
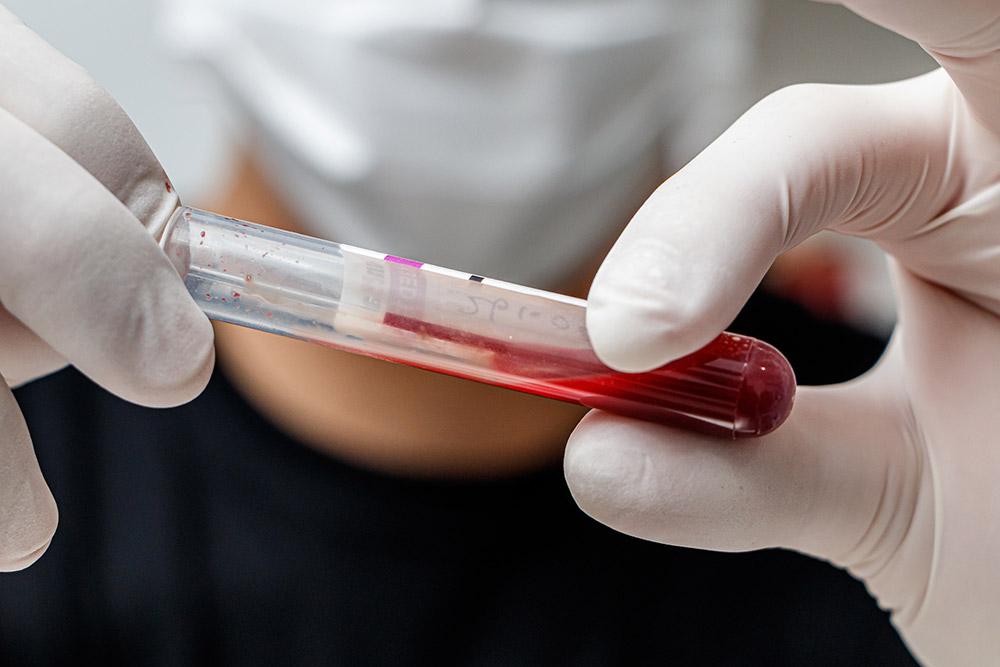
- Whole blood in anticoagulant (eg. EDTA, heparin)
- Centrifuge
- Microhaematocrit (capillary) tubes
- Plasticine or clay tray
- Clean, non-sterile gloves
- Paper towel or tissue
Procedure
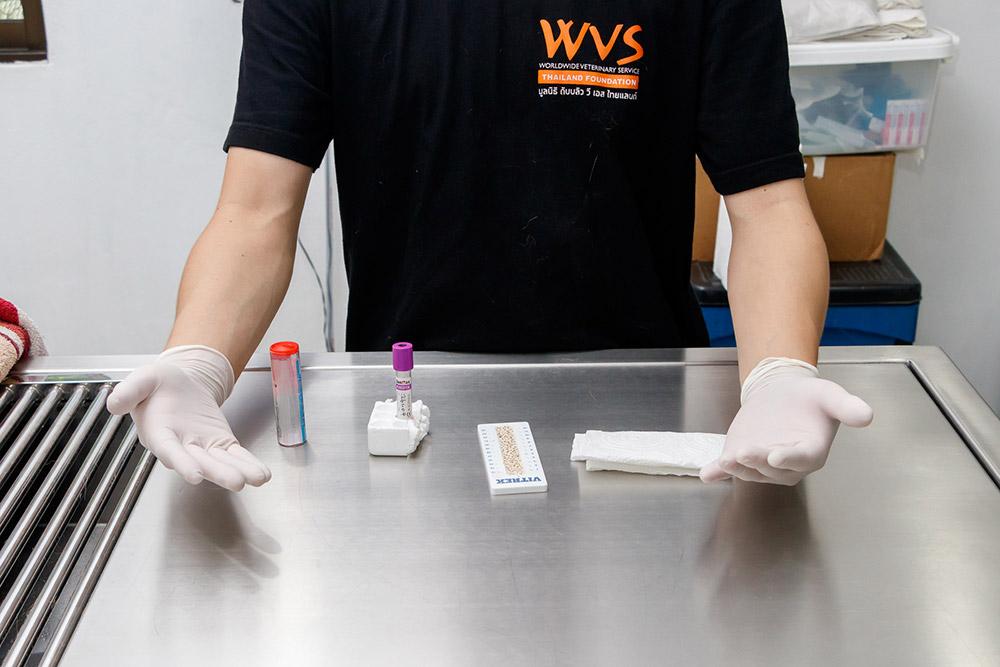
Choose a suitable location that can be easily cleaned, such as in the area below.
Invert your blood sample a 5-7 times to gently but thoroughly mix the sample and resuspend the red blood cells.
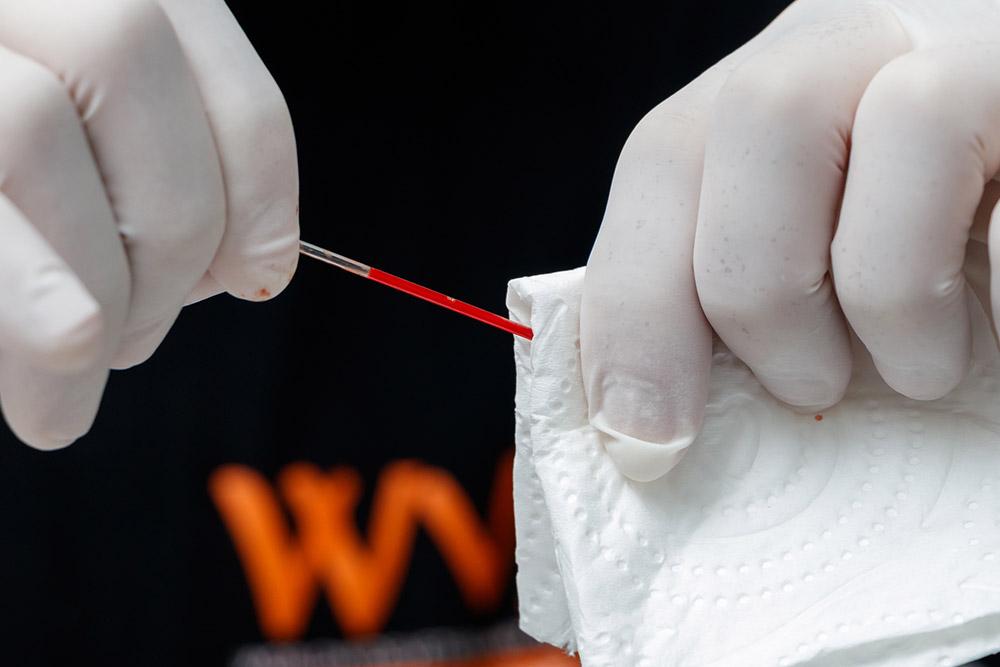
Take a microhaematocrit tube to collect your sample.
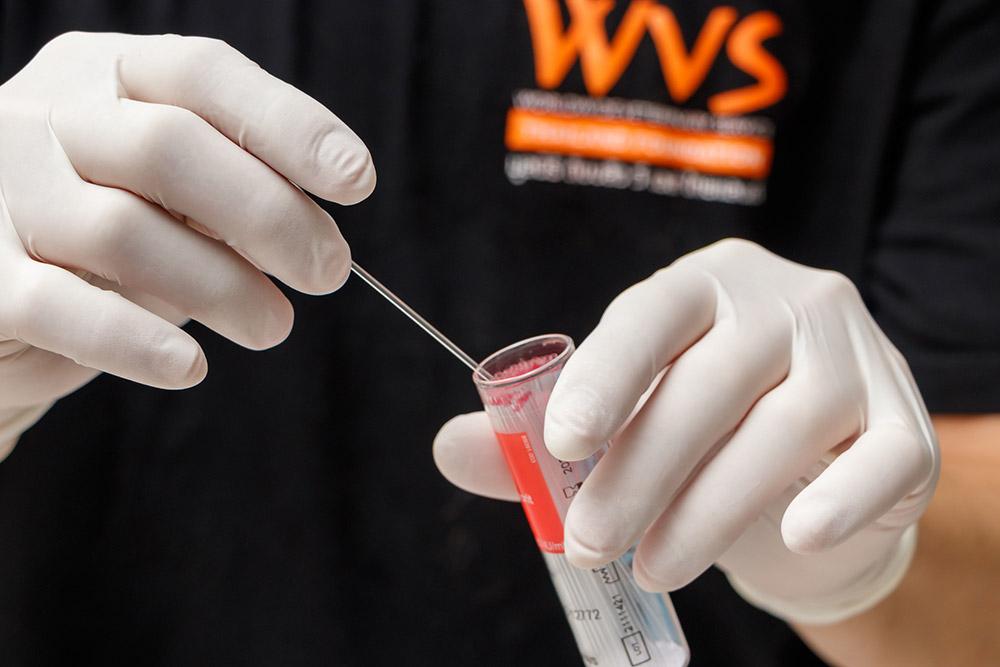
Place your finger over the top of the tube (this helps to prevent air bubbles forming at the other end of the tube). Dip it into the blood at an angle to allow the blood to draw up into the tube by capillary action. Aim for 2/3 of the tube to be filled with blood.
Remove the tube keeping your finger on the top.

Wipe the surface of the tube with a clean cloth to minimise contamination of the plastic tray.
Locate an area in the plasticine tray that does not have any holes.
Press the end of the tube into the plasticine into this area to seal it; at the same time, remove your finger from the end of the tube. Wipe the surface of the tube with a clean cloth before doing this to minimise contamination of the plasticine tray.
Check for the plasticine plug as you remove the tube to ensure the sample is sealed.
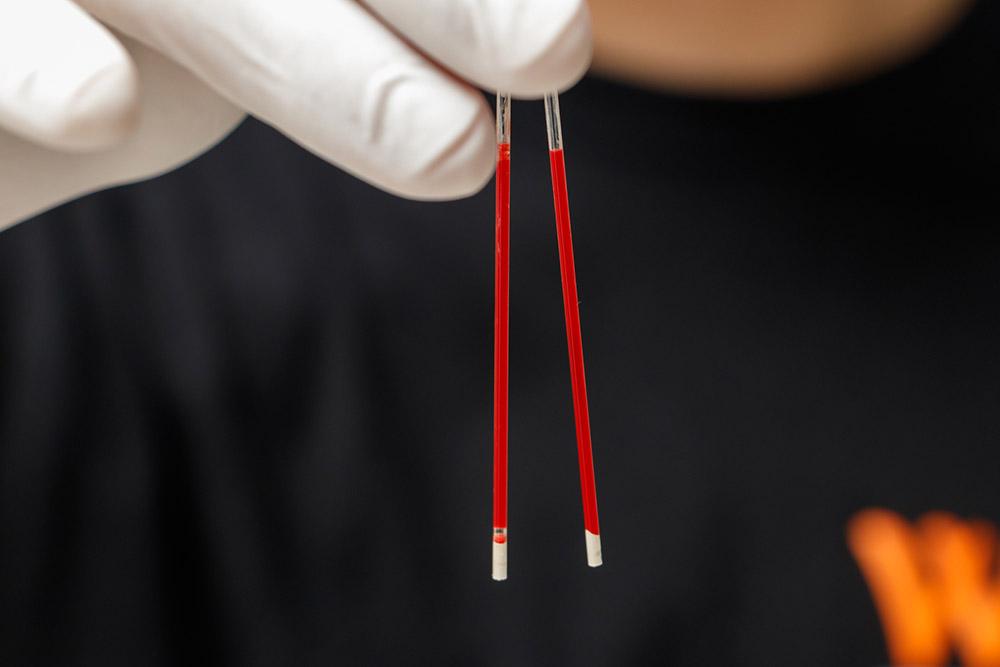
Repeat the process so you have two sealed tubes. You will need two to balance the centrifuge.
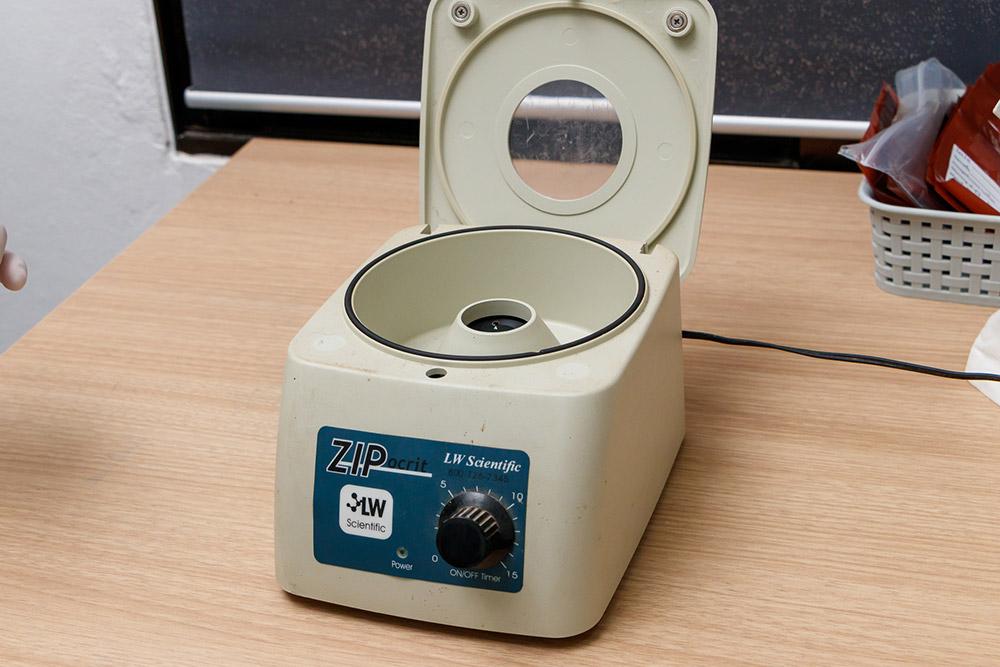
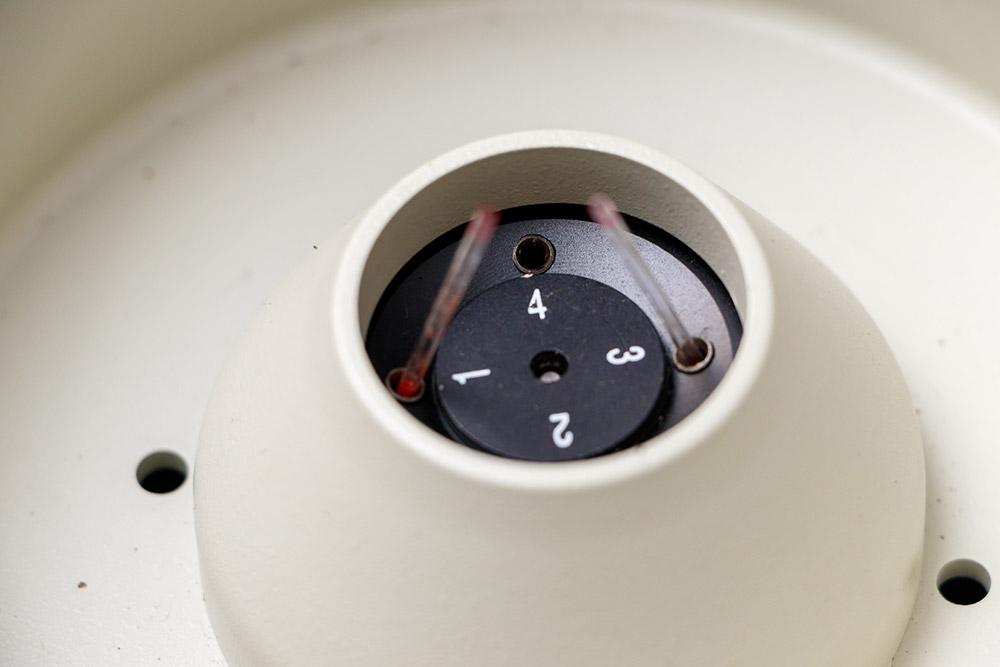
Open the centrifuge door. The type of centrifuge you will need is a microhaematocrit centrifuge (microfuge). Check it is empty and clean.
Place your samples opposite each other to ensure the microcentrifuge is balanced correctly. Ensure that you put the sealed ends in first.
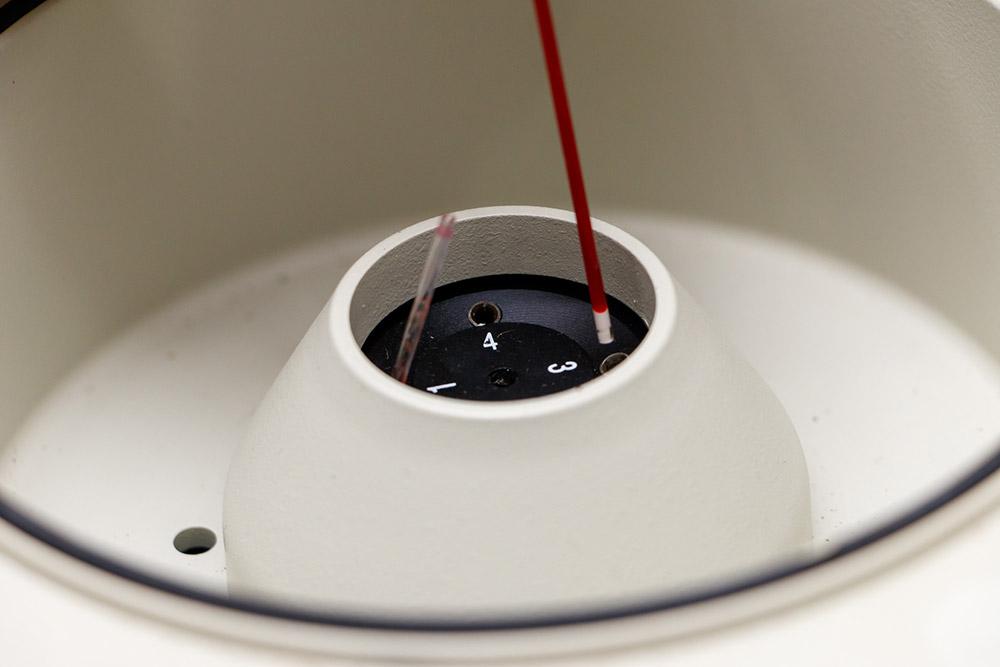
The image below shows the two tubes are correctly placed to balance the machine when it is spinning.
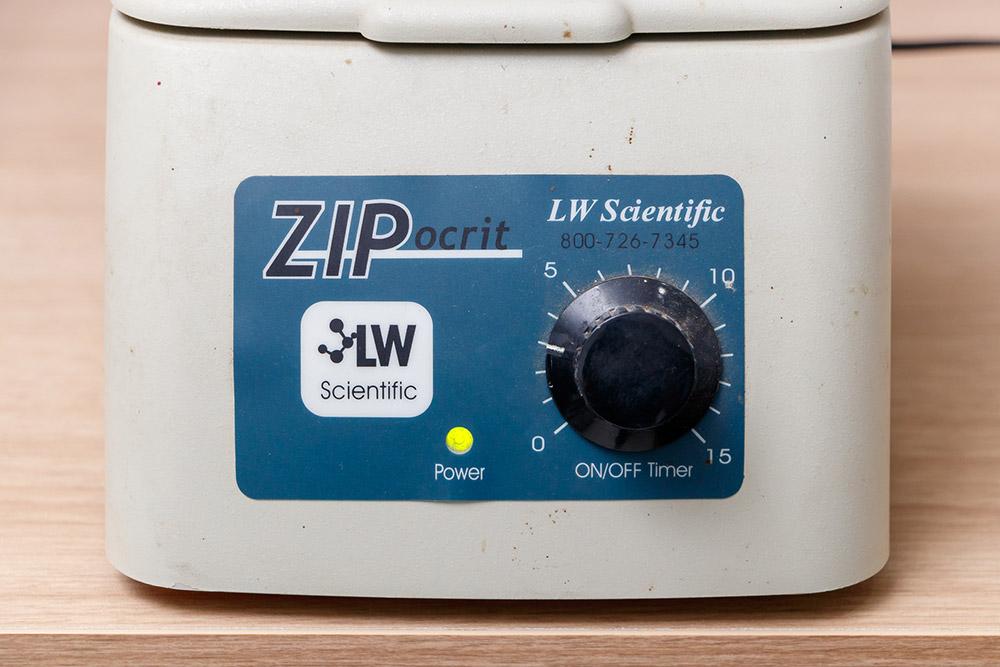
Ensure the lid is securely fastened. This is important for safety reasons. Then, set the timer for 3-5 minutes to separate the red blood cells from the plasma.
Remove the tubes once the machine has finished. This is what the tube will look like:
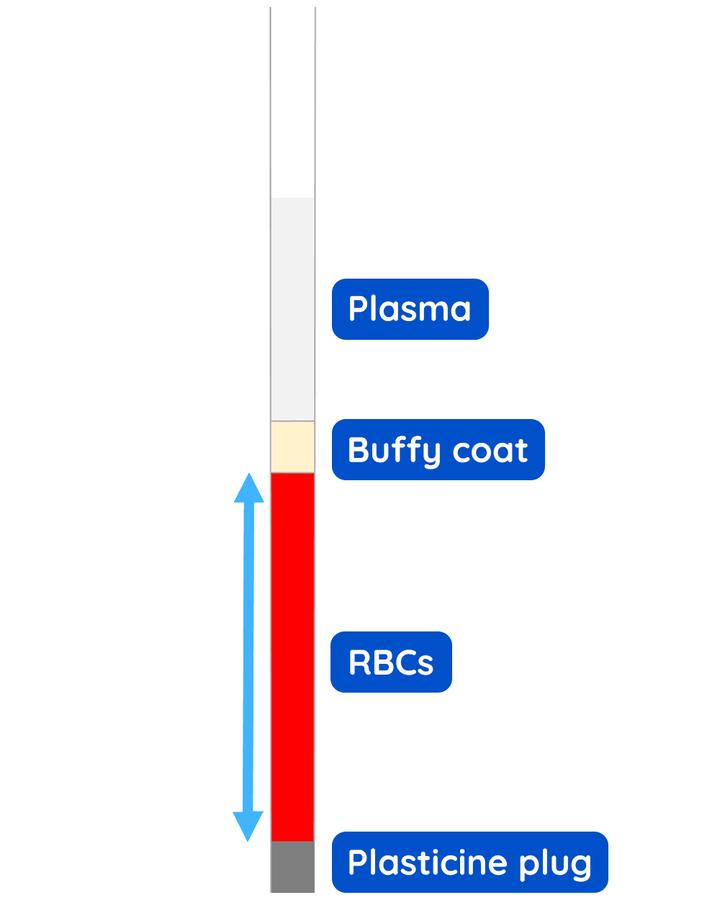
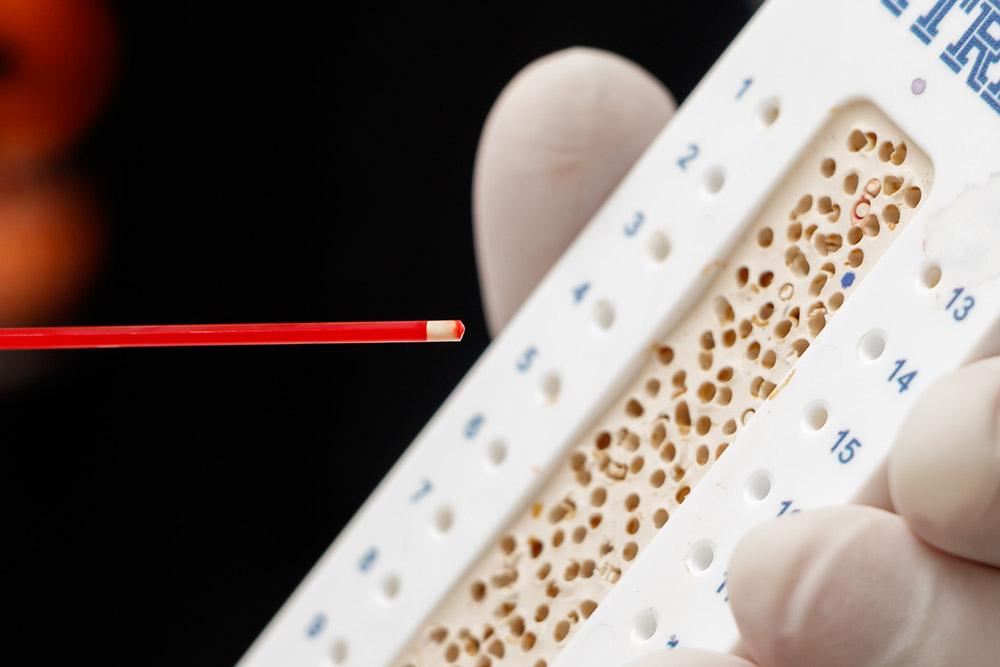
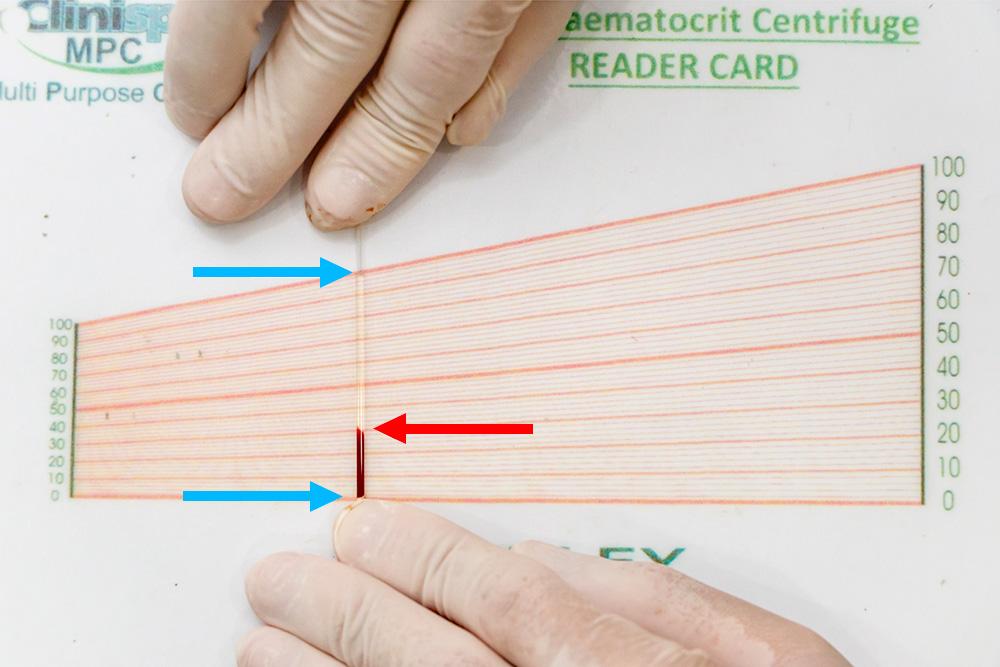
The PCV is calculated by dividing the length of the RBCs (blue arrow) by the combined length of the RBCs, buffy coat and plasma (not including the plasticine plug). To do this, use a haematocrit reader card.
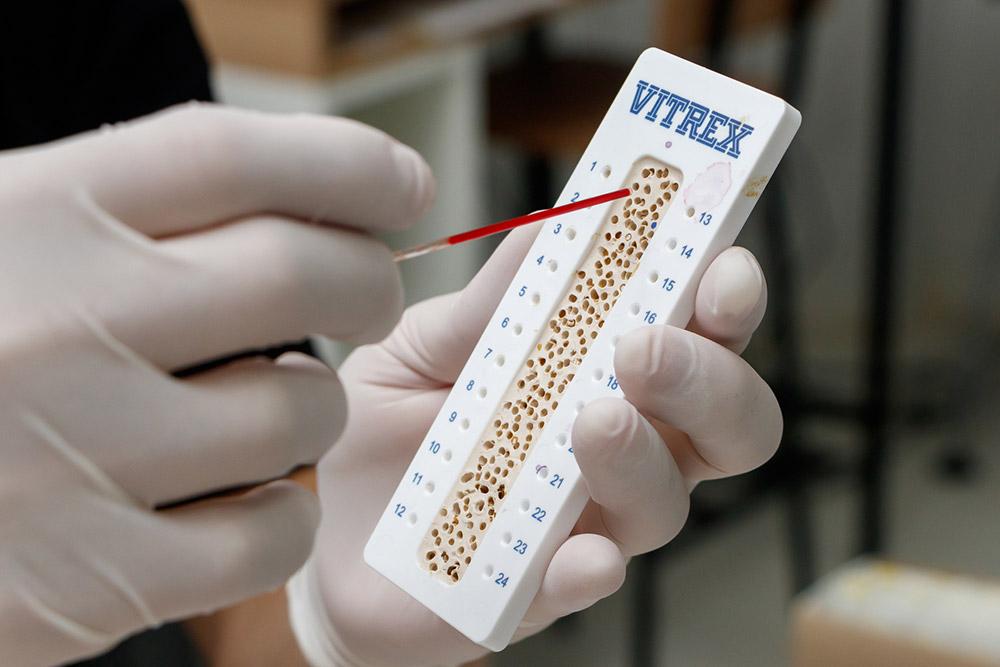
Place one tube on the haematocrit reader card.
- Align the top of the plasma fraction with the top, sloping line on the card (which measures 100% on the right hand scale).
- Align the bottom of the RBC fraction with the lowest horizontal line (which measures 0% on the right hand scale).
The tube is now in the correct position for measuring the PCV.
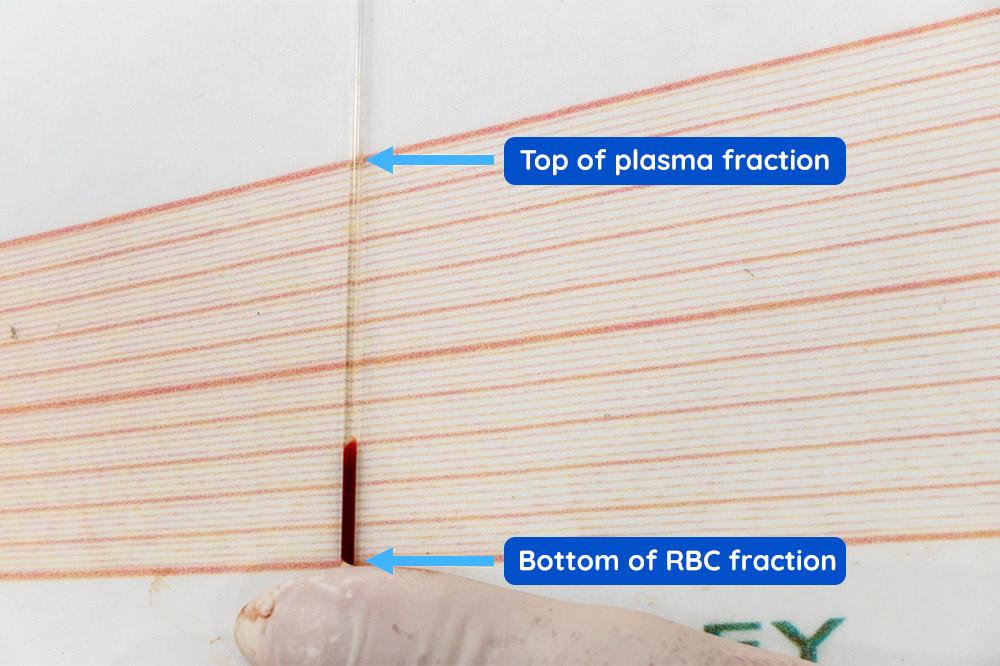
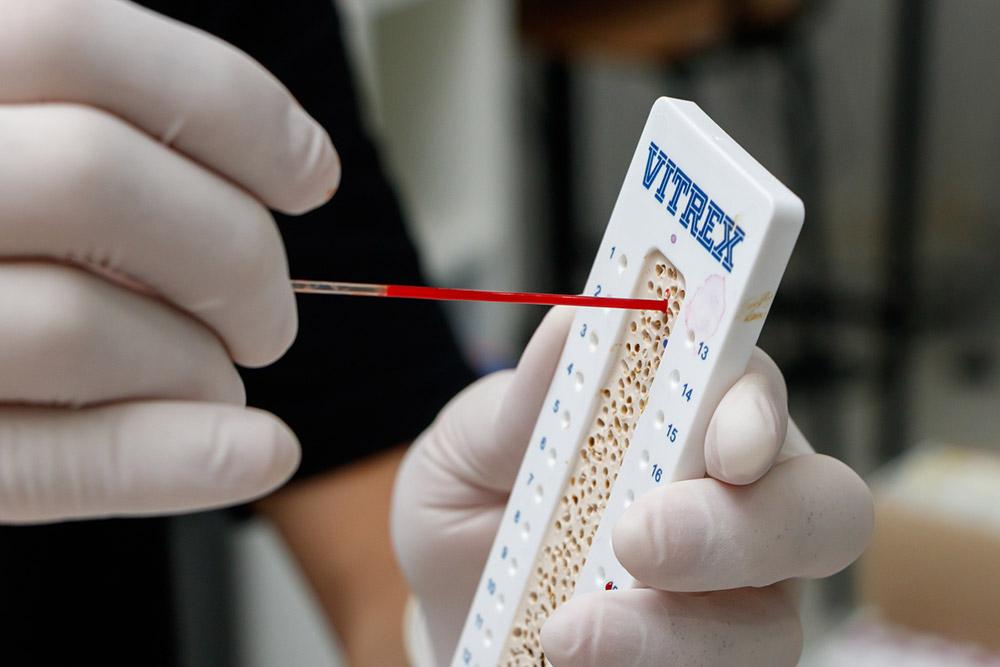
Read the PCV value. To achieve this, identify the red line that is associated with the top of the RBC fraction (red arrow, Figure 18).
Follow this line (shown below in red below, Figure 19) from the top of the RBC fraction to the scale on the right hand side. Note the line is at a slight slant.
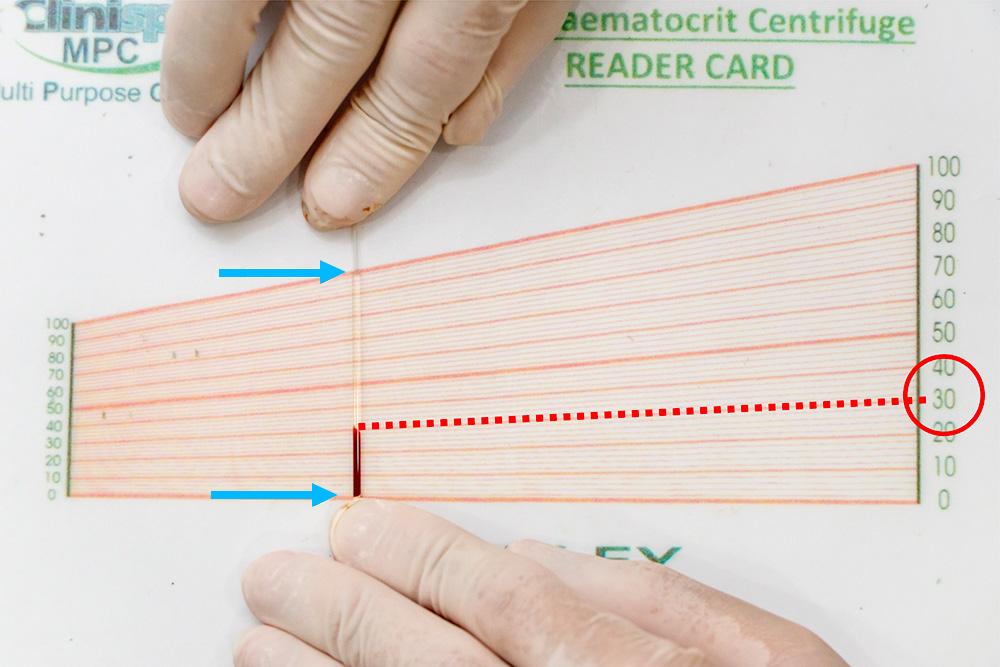
Take note of the value; this is simply the height of the RBC fraction divided by the height of the total sample and expressed as a percentage. In this example, the value is 30%.
Normal values for PCV
Values range depending on factors such as breed and age, but normal is considered to be between 35-57% (dog) and 30-45% (cat)*.
(*Reference — msdvetmanual.com)
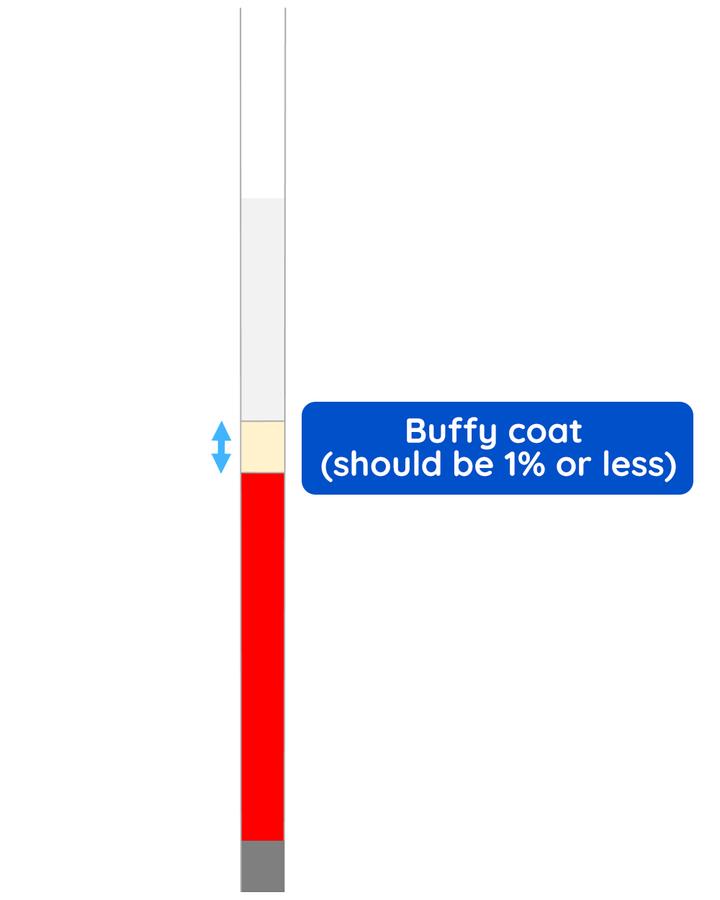
Visual assessment of buffy coat
You are not done yet! Visualising the spun down sample can provide you with further clues. Have a look at the buffy coat which contains white blood cells and is approximately 1% of the total length of the sample (blue arrow). If it is increased, it signals an increase in white blood cells, which could be due in inflammation, infection or neoplasia.
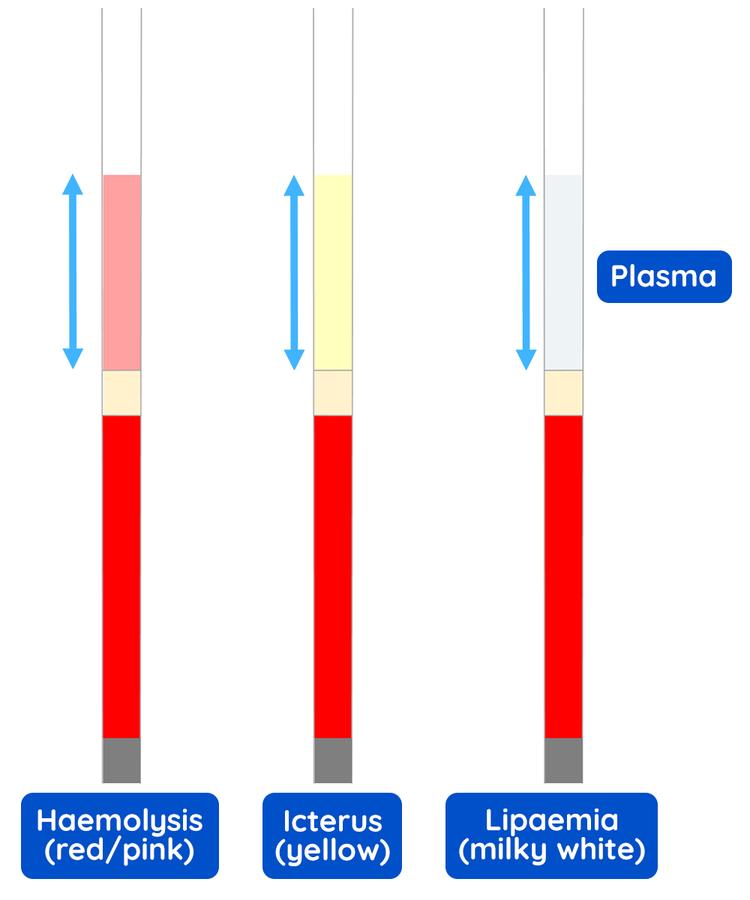
Visual assessment of plasma
The colour of the plasma component can suggest certain conditions.
Haemolysis. The plasma will be pink/red. Remember, if you damage the cells sufficiently during blood collection, this may cause iatrogenic haemolysis. Remember to check a urine sample for haemoglobinuria, which will confirm true haemolysis.
Icterus (jaundiced). If the sample is yellow, consider the causes of jaundice. Remember to correlate this finding with clinical signs.
Lipaemia. Increased lipids in the blood can cause the plasma to appear milky white.
The next step is to measure total solids (TS); this is explained in the next article.