Scalpels
Scalpels are suited to making cuts which minimise trauma to surrounding issues. In order to do this, blades should be kept sharp and must be replaced frequently, as repeated use will blunt the cutting edge.
Never use the same blade for multiple patients as this could result in the transfer of disease.
Cutting technique
Scalpels should be used confidently, with sufficient pressure to complete the cut in one smooth action.
For a long incision (such as cutting through the skin of the abdomen) it is important to use the whole of the cutting edge of the blade (Figure 1), rather than pointing downwards with just the tip; furthermore, scalpels should never be used in a 'stabbing' motion. Your other hand can put tension on the tissue to reduce downward pressure of your cut, and keep the surface immobile whilst you make the incision.
Avoid multiple, timid 'paint-brush' cuts, as these will cause increased trauma, creating a 'feathering' effect. This is more likely to result in multiple bleeding sites and a ragged incision, which may be more difficult to close neatly afterwards and therefore compromise healing.
Correct handling
There are different ways to hold a scalpel, depending on the cut requiring.
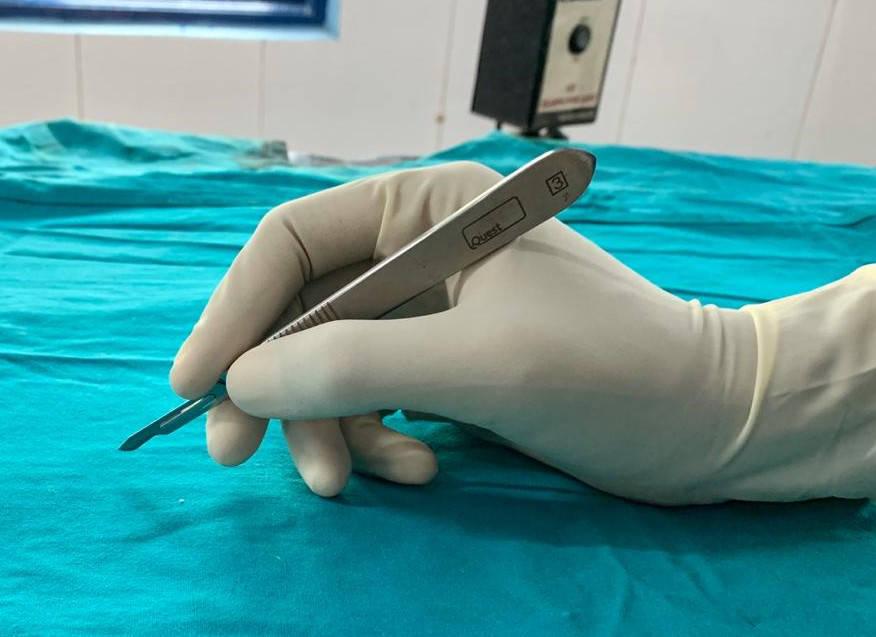
Pencil grip. The scalpel is held with thumb, and middle finger while the index finger is placed on the upper edge to help guide the scalpel (similar to holding a pen or pencil) (Figure 2). This is a stable grip with good control, enabling shorter, sliding cuts, and is used commonly in small animal surgery.
Finger tip grip. The scalpel is held between the fingers on one side, and the thumb on the other. This is less stable and has less control, however it can be useful for longer incisions (Figure 3). The index finger can still be placed on top to guide the blade, if needed.
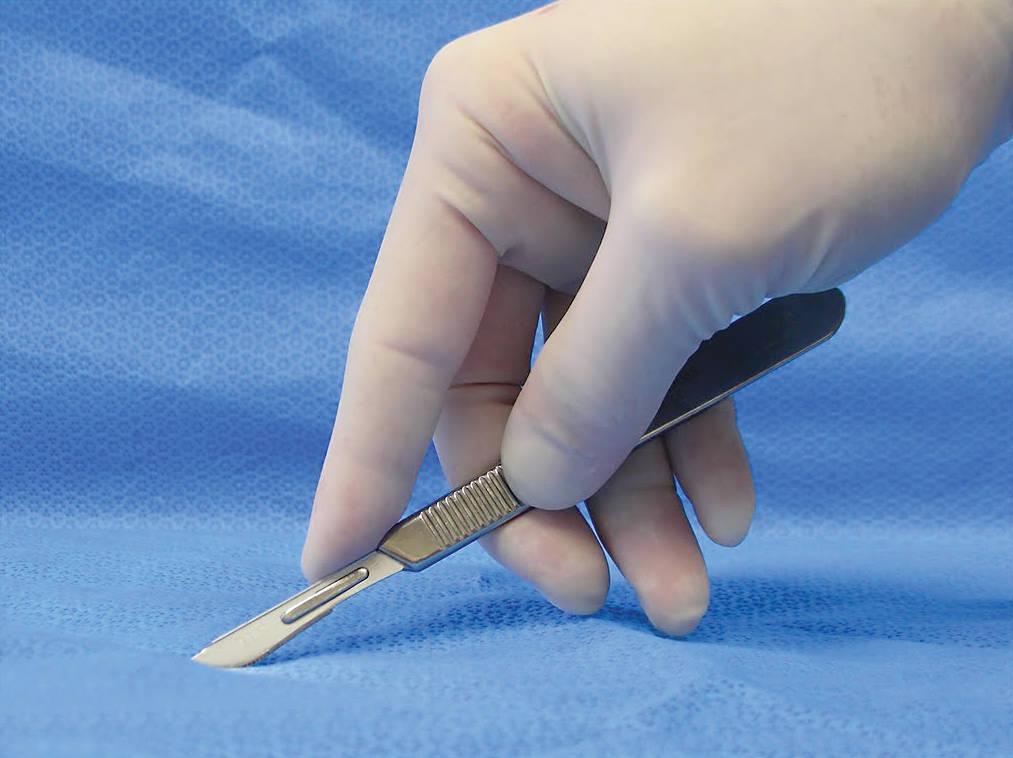
Photo credit - © BSAVA. Reproduced with permission from the BSAVA Manual of Canine and Feline Surgical Principles.
Scissors
There are times when it is appropriate to use scissors to make cuts, rather than a scalpel. There are a variety of scissor types, each suited to different kinds of surgical tasks.
Using the appropriate type of scissors for each task helps to avoid excess damage to the tissues, and to the scissors themselves.
Scissor action has a crushing component so can be more traumatic as compared to a scalpel, but when used correctly, they are very effective surgical tools.
Non-tissue scissors
These scissors are only used externally, however they should still be sterile to avoid transmitting infection to an otherwise clean wound.
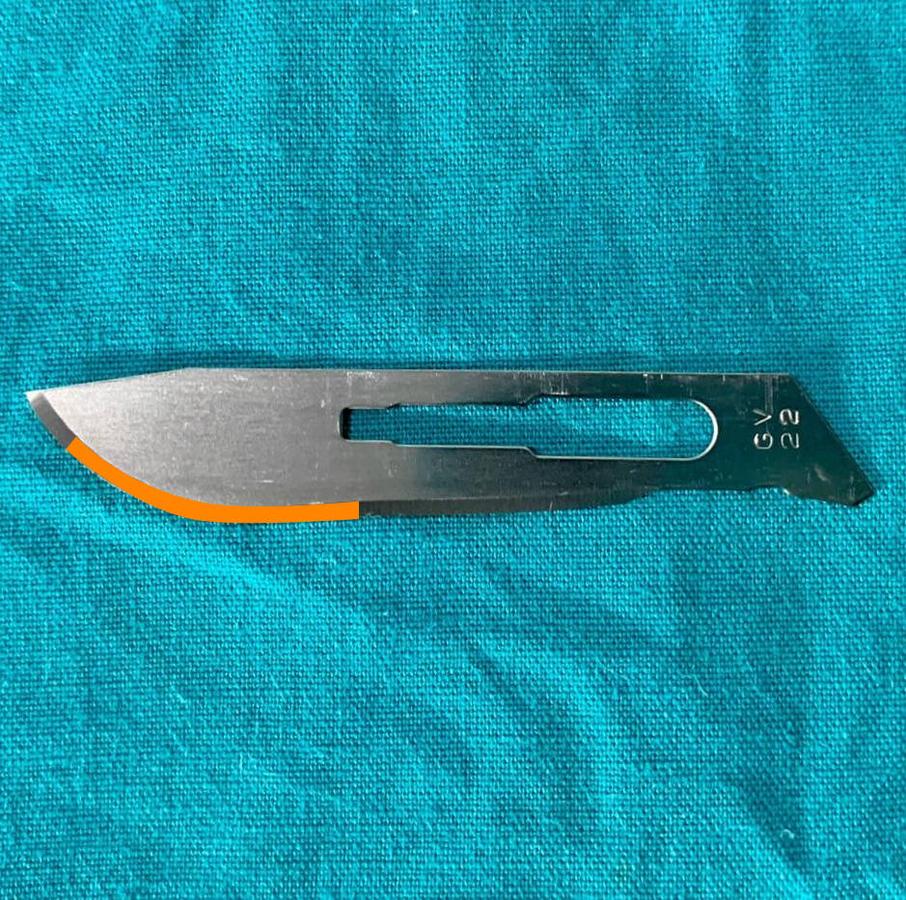
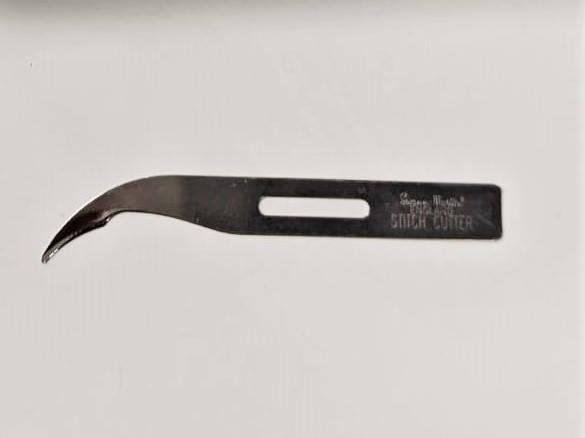
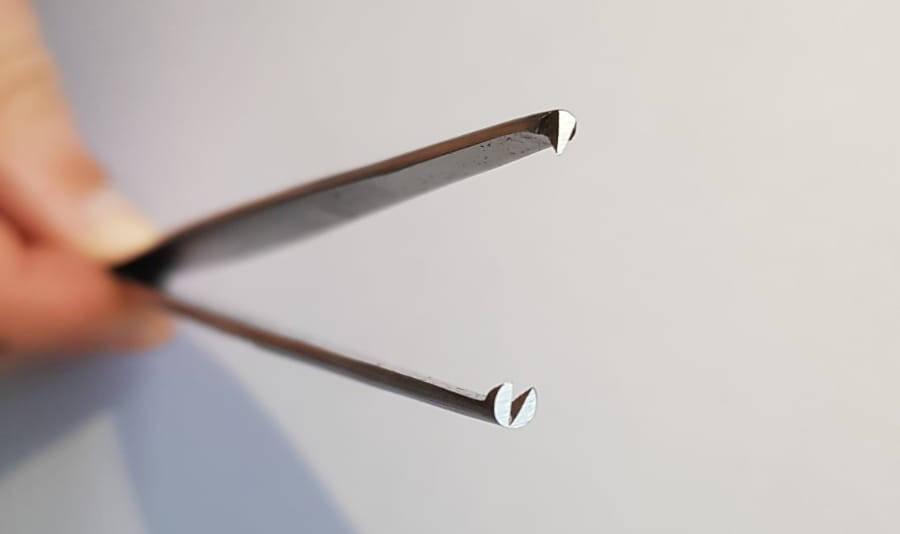
Suture scissors. These have a hooked lower blade and are only used to remove suture material.
An alternative to suture scissors is a sterile, disposable hook scalpel blade (Figure 4); these may be preferable because they are single use, which ensures sterility and a sharp edge.
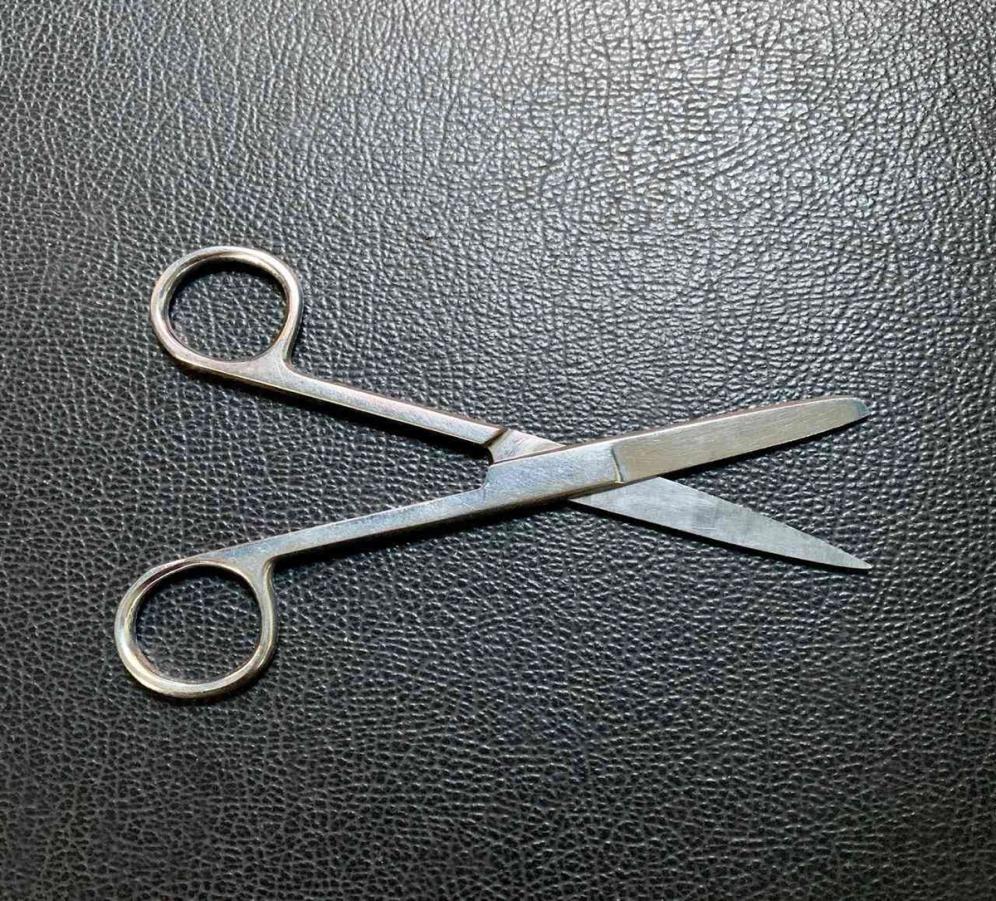
Blunt-sharp scissors. Robust instruments suitable for cutting materials such as sutures or disposable drapes (Figure 5).
Wire scissors. Very strong scissors, designed to cut surgical wire with a shearing action.
Bandage scissors. Not to be used for surgery! These scissors usually have a protected end on the lower blade to protect the skin during bandage removal, but should not be used during surgical operations. Therefore, bandage scissors should be kept clean, but generally do not need to be sterile.
Tissue scissors
Tissue scissors are for cutting tissues only; avoid using them for tasks such as cutting suture material, as these activities blunt the sharp edge.
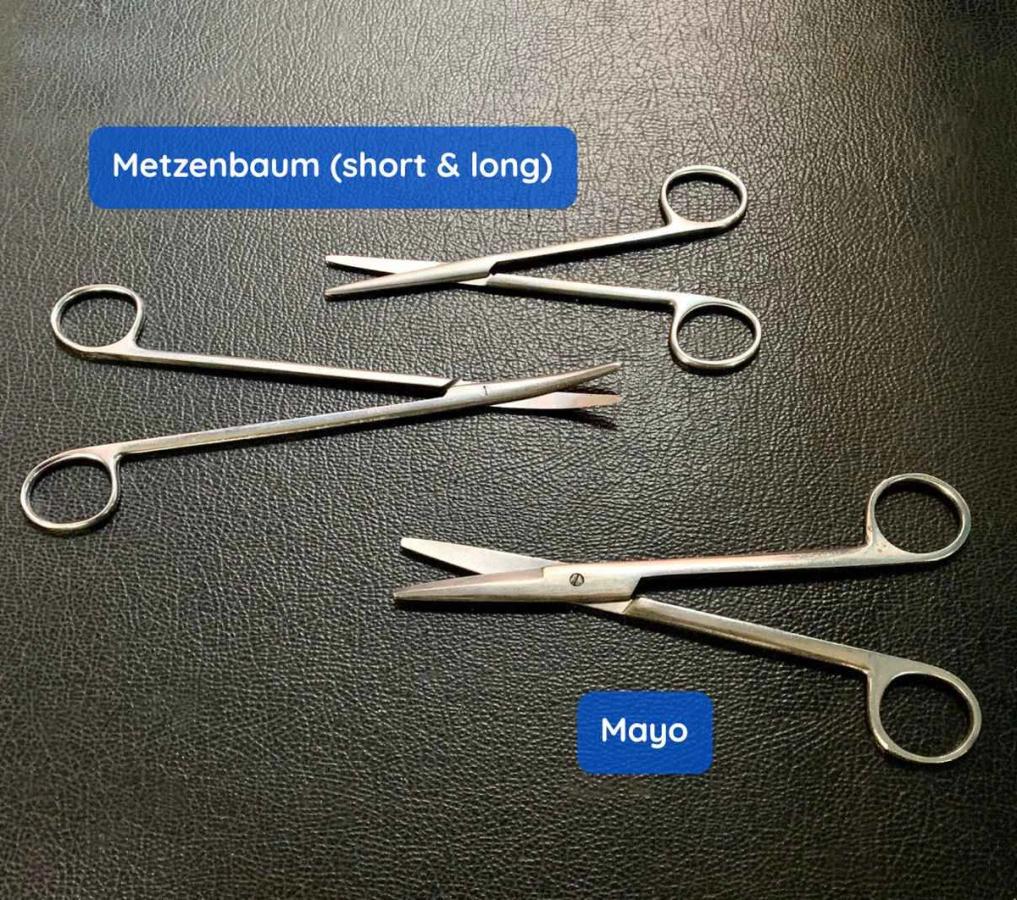
Mayo can be straight or curved, and the points tapered or rounded. They are robust scissors and are used for dissecting and cutting strong tissues such as fascia (Figure 6).
Metzenbaum are similar to Mayo scissors but they have shorter blades relative to the handles. They are used for precise, fine dissection around delicate tissues (Figure 6).
Iris have sharp or blunt points and small shank. They are designed for very delicate, precise procedures (not normally required for spay-neuter surgeries).
Correct handling of scissors
The thumb and ring finger are inserted into the rings of the scissors while the index and middle finger are used to guide the instrument (Figure 7). This is known as a 'tripod' grip. Most scissors are designed for right-handed surgeons so that when they are used, maximum shear is applied to the blades. If a left-handed surgeon uses these scissors, forces are reduced and the results are less precise. Left-handed scissors are available, although, in reality, it is preferable if a left-handed surgeon can learn to use scissors with their right hand.
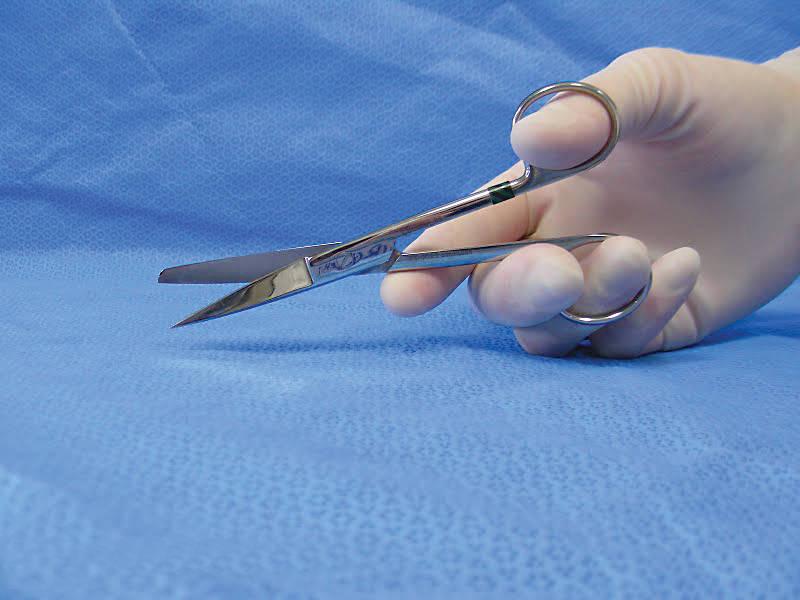
Photo credit - © BSAVA. Reproduced with permission from the BSAVA Manual of Canine and Feline Surgical Principles.
A 'push-cut' technique can be used to open fascial planes such as fascia lata and the linea alba. To do this, insert one blade under the tissue plane, partially close the scissor, and then, keeping the blades in this position, advance the scissor forward.
Thumb forceps
Thumb forceps are designed for stabilising and manipulating tissues and occasionally needles or swabs; they can also replace fingers when holding and manipulating small suture needles. Their ends are either plain or toothed ('rat toothed'). They are available in a variety of lengths, widths and jaw types, and you should know which are safe to use on delicate tissue, as some are more traumatic than others.
Rat-toothed forceps are used for dense tissue (Figure 8), whilst those with plain ends are for handling more delicate tissues.
Thumb forceps are manipulated and compressed between the thumb and forefinger and held like a pen (Figure 9).
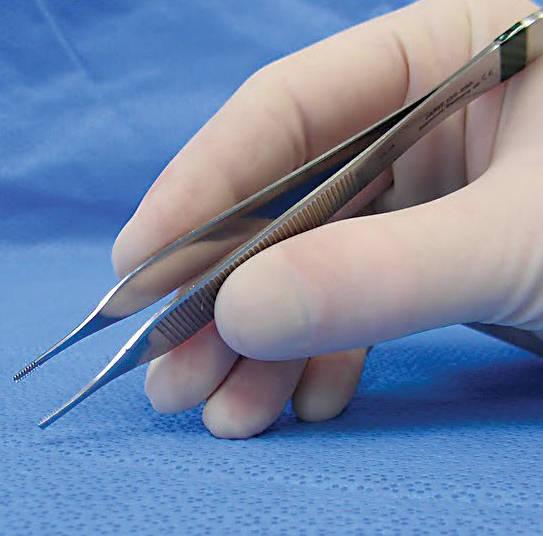
Photo credit - © BSAVA. Reproduced with permission from the BSAVA Manual of Canine and Feline Surgical Principles.
They have a 'tweezer' appearance with a spring action, such that you have manual control of the forceps' grasp by pressing the two jaws together. There are a variety of thumb forceps which are described below:
Dressing forceps are robust and do not have teeth. They are used to hold adventitia or loose or dense connective tissue, in order to aid in dissection. They are also useful for manipulating gauze sponges or swabs in order to control blood or contamination during surgery. They should not be used for handling delicate tissues, as a crush injury can easily occur.
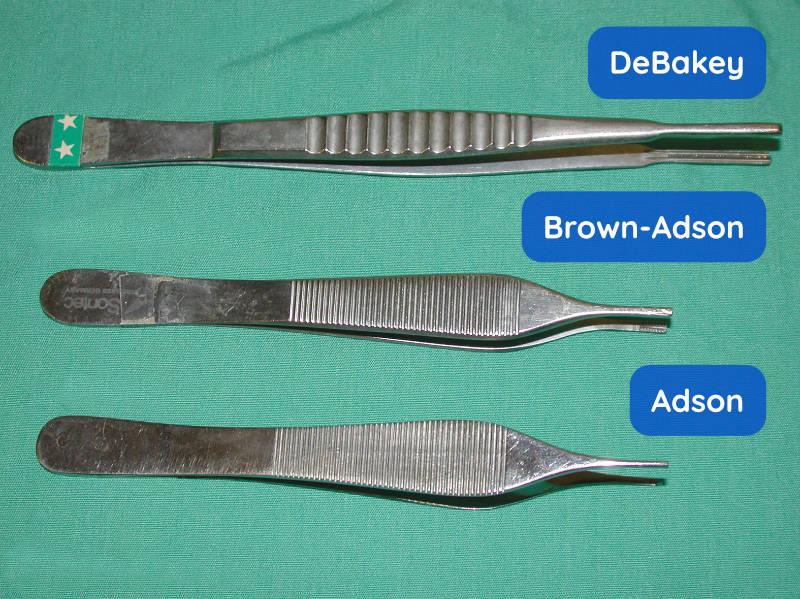
DeBakey forceps are atraumatic, and are suitable for use on delicate tissue such as the gastrointestinal tract (Figure 10).
Bonney forceps (rat toothed) are a heavy, robust instruments for use on tissues such as the linea alba. They have 1:2 or 2:3 teeth and a metal insert behind the teeth for gripping needles.
Potts Smith forceps (rat toothed) are longer and delicate, and are used for manipulating more delicate tissues such as the intestinal tract.
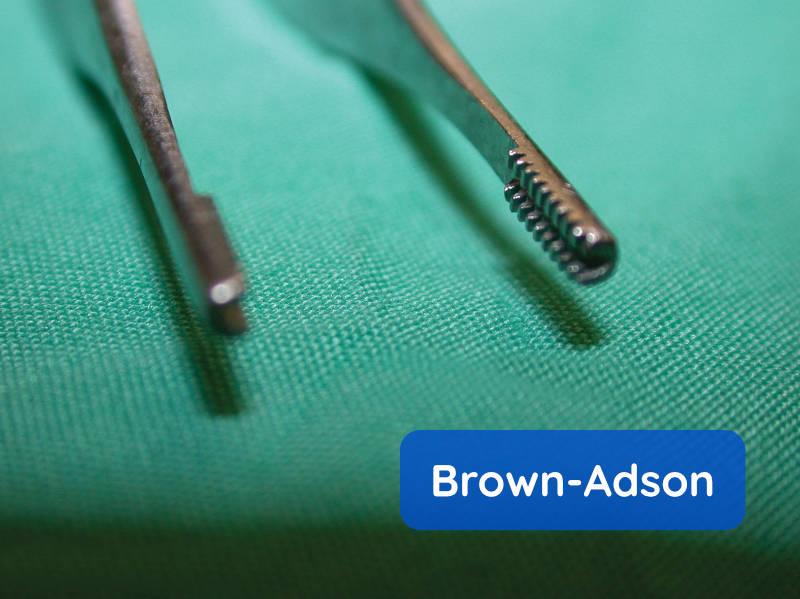
Adson forceps (rat toothed) have 1:2 teeth and Brown-Adson forceps are similar but have multiple inter-meshed fine teeth (Figures 10 and 11). Both are designed for use in delicate tissues, such as skin. They give fine tissue control.
Tissue forceps
Tissue forceps have a 'scissor' shape with a ratchet mechanism which allows the instrument to be locked/held in a closed position onto the tissue.
You should appreciate which forceps are safe to use on which tissues, as some tissue forceps are more delicate whilst others can cause significant trauma.
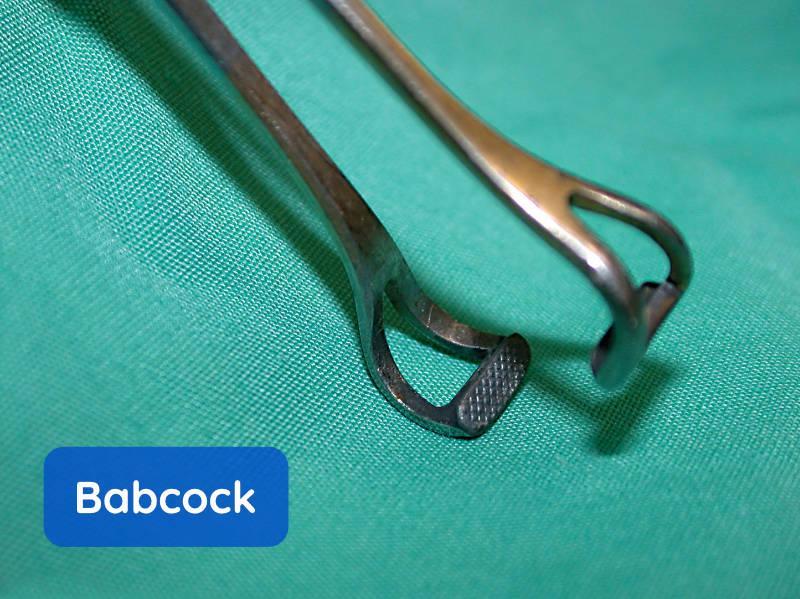
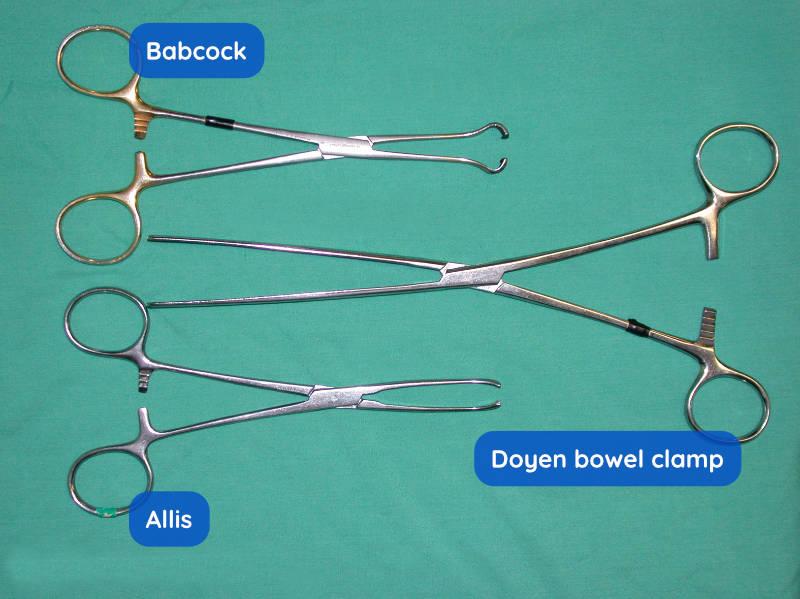
Babcock tissue forceps have a broad, blunt and flared tip that provides a delicate grasping action. They can be used with care on tissues remaining in the body (Figure 12).
Doyen intestinal forceps are designed to hold the intestine without crushing (Figure 13). They have long, thin jaws with longitudinal, non-crushing serrations. They have a more delicate touch because they are bowed in shape, meaning the tips of the jaws only just meet when the ratchet engages. This provides a delicate, non-traumatic grip.
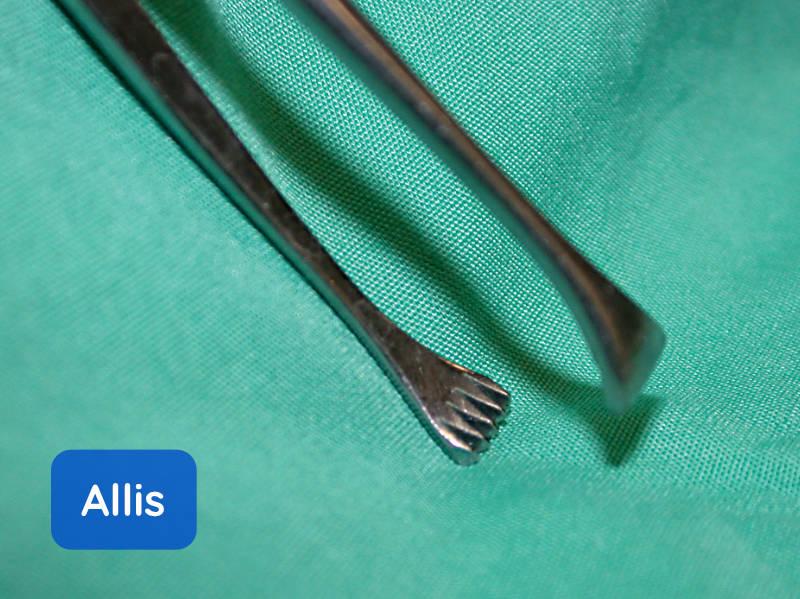
Allis tissue forceps are a strong sturdy instrument with a number of teeth on the gripping surface (Figures 13 and 14). They may crush tissue and should be used with care, as they can be quite traumatic. They are used to firmly grasp tissues that are to be removed from the body, due to the damage that they can cause.
Noyes alligator forceps have a long, thin shaft and pivot point near the short jaws at the tip of the instrument. They can therefore enter small openings and are excellent for removing foreign bodies from structures, such as the ear canal.
Haemostatic forceps
Haemostatic forceps, or haemostats, are designed to occlude bleeding vessels. They are available in a wide range of sizes and are either curved or straight. They are hinged, and can be 'locked' closed using the ratchet mechanism. They will crush tissues: the jaws meet before the ratchet engages, so using the ratchet will give further compression and increase the crushing effect.
Haemostatic forceps should be held using the 'tripod' grip, as with scissors. The thumb and ring finger are inserted into the rings, while the index and middle finger are used to guide the instrument.
The tips of the forceps are applied to a bleeding vessel. This controls haemorrhage with minimal trauma of the surrounding tissue. Curved haemostats can be used pointing downwards to clamp small bleeding vessels. They can also be used curving upwards, to grasp a bleeding stump.
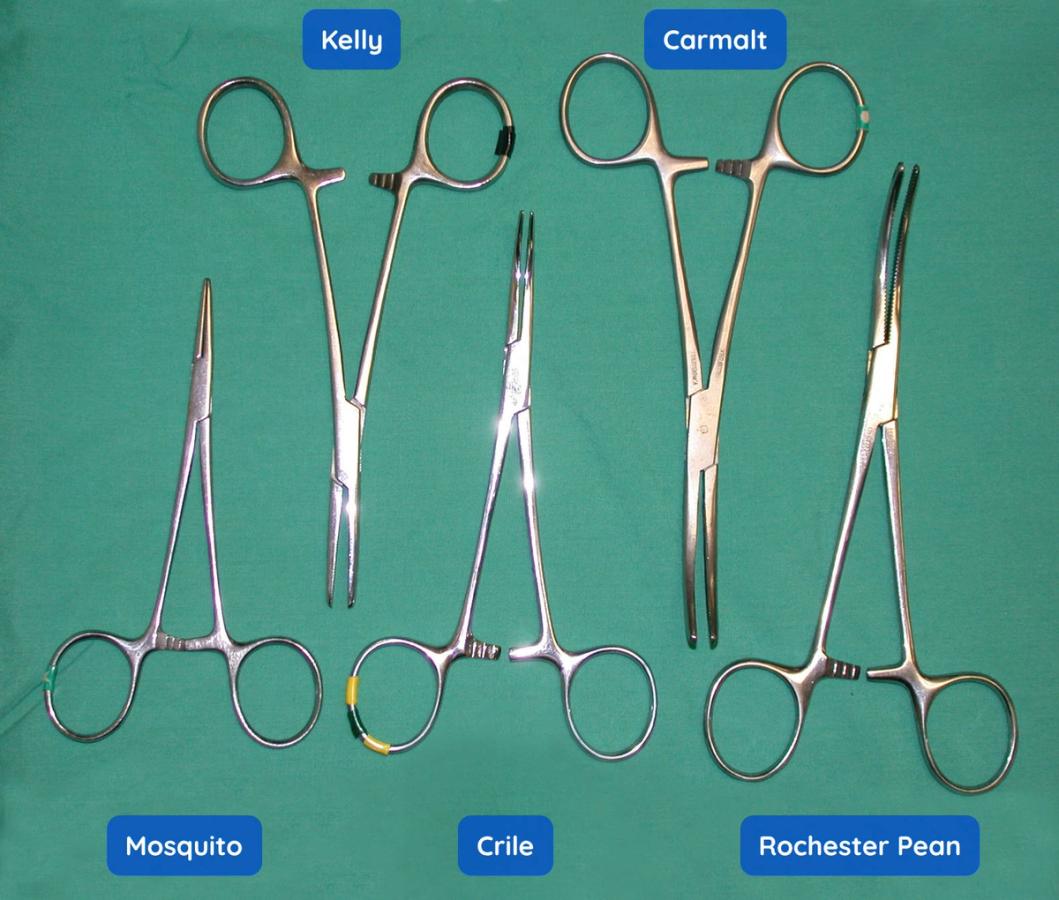
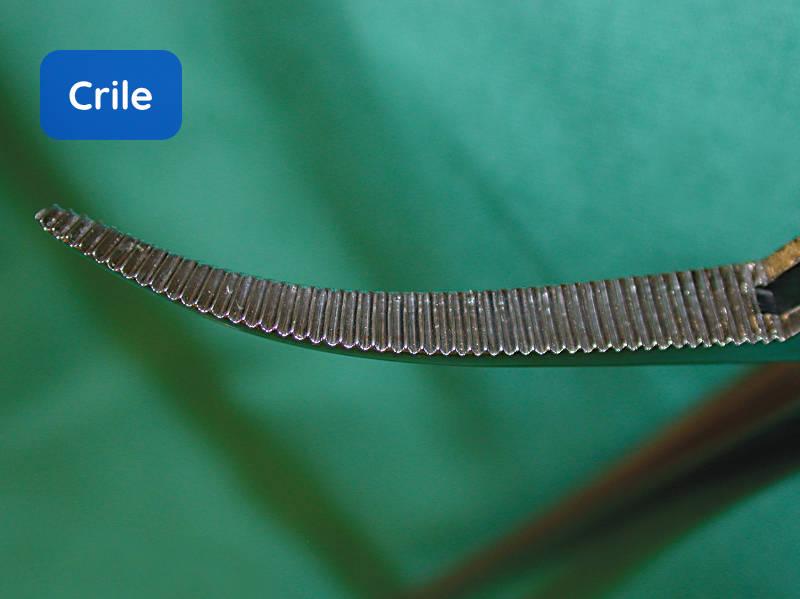
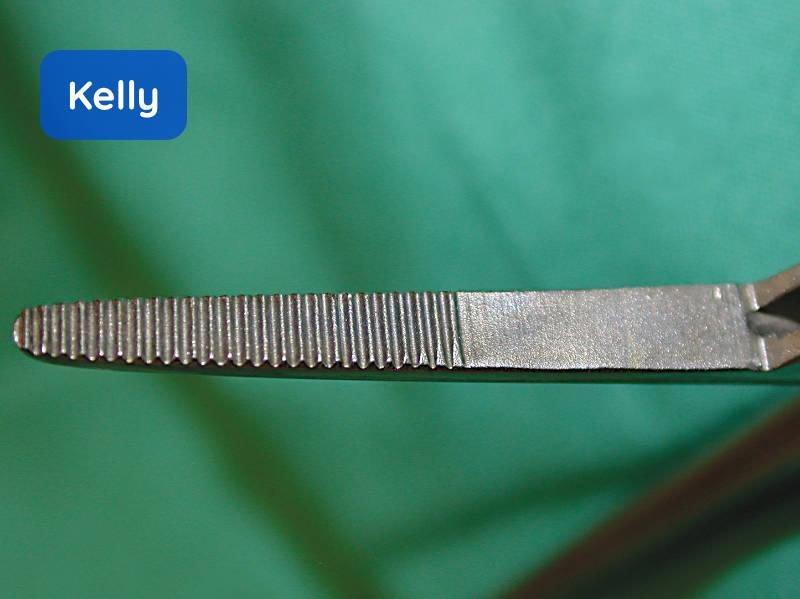
Kelly and Crile haemostats are more robust. The Kelly design has transverse grooves on the distal half of the jaws only whilst the Crile has grooves over the entire surface.
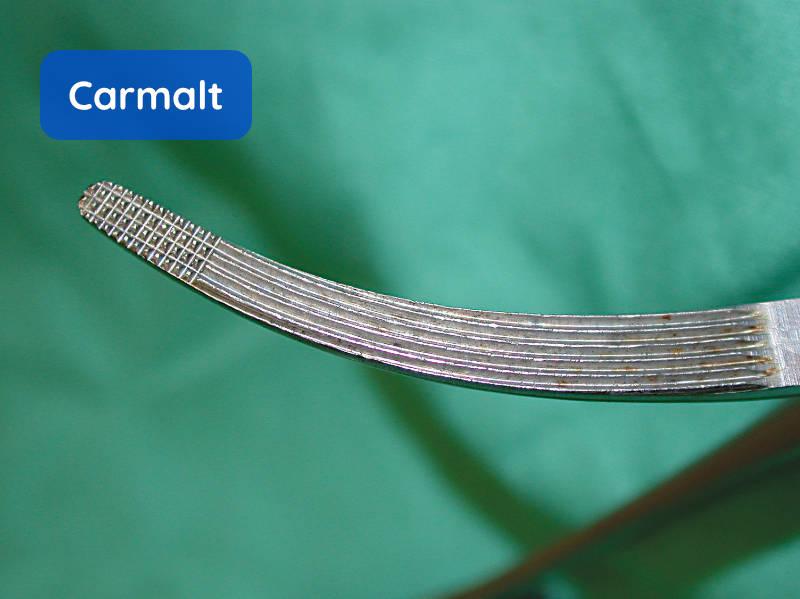
Carmalt (Rochester-Carmalt) haemostats are sturdy instruments with their gripping surface containing longitudinal serrations with cross-hatching at the tip. These are large forceps suitable for clamping blood vessels and large tissues, and also for ligating pedicles.
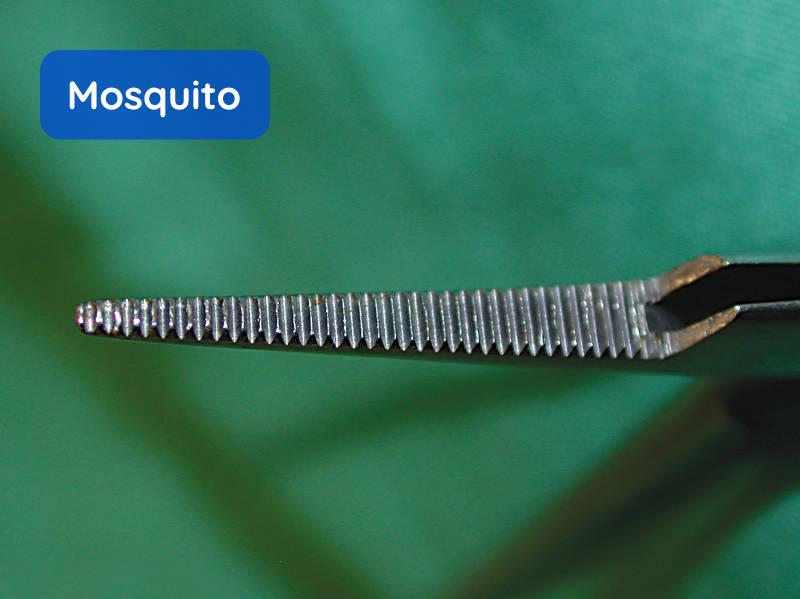
Halsted Mosquito haemostats are small delicate instruments and are often very useful in small animal surgery.
Rochester-Pean haemostats have full horizontal serrations. These are also are used for vessels and larger tissues.
These forceps are illustrated in Figures 15 to 19.
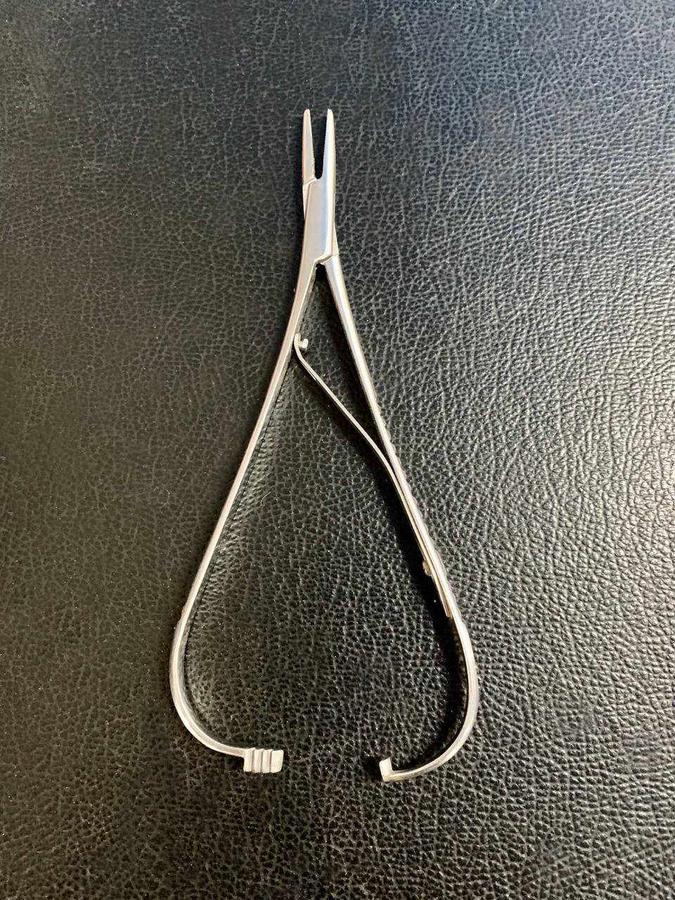
Needle holders
Needle holders have a 'scissor' shape, and usually have a ratchet mechanism. They are robust instruments, so they can cope with repeated metal-on-metal use when griping needles. Some needle holders therefore have tungsten-carbide inserts to provide an improved grip and durability, which can be replaced when worn.
Needle holders should be handled using the 'tripod' grip. Needles are then placed in the short, strong jaws and held in place by locking the ratchet (if present). The needle should be grasped by the jaws at the mid-point of the needle, but can be held closer to the tip for more control when suturing tough tissue (Figure 20).
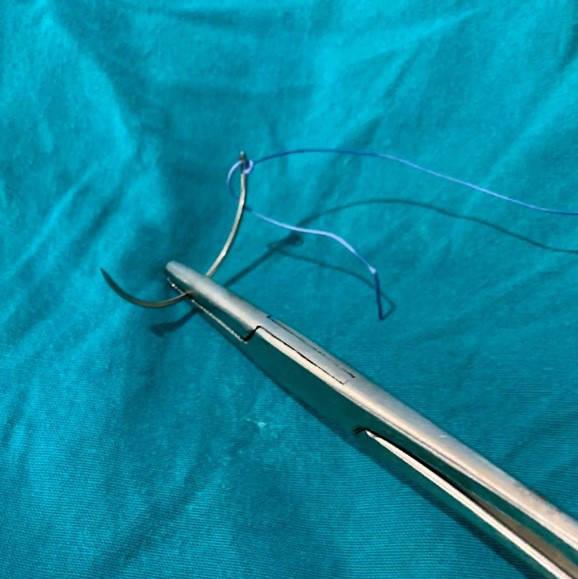
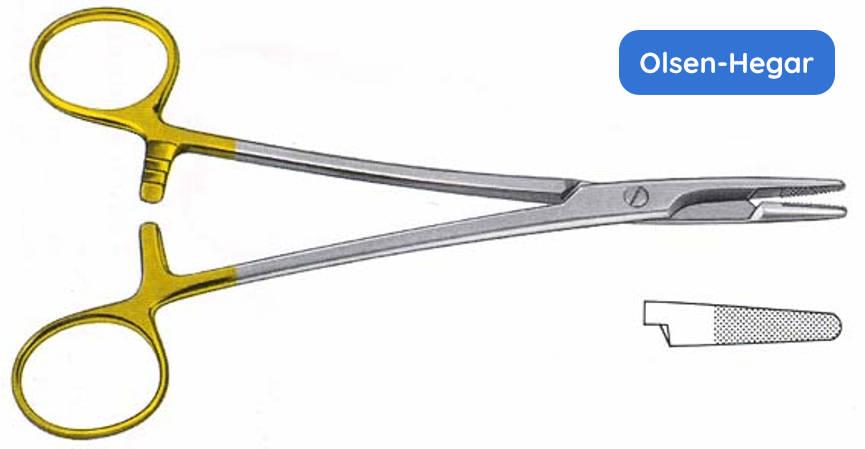
Olsen-Hegar incorporates a cutting edge just caudal to the jaw, which can be used to cut suture material (Figure 21).
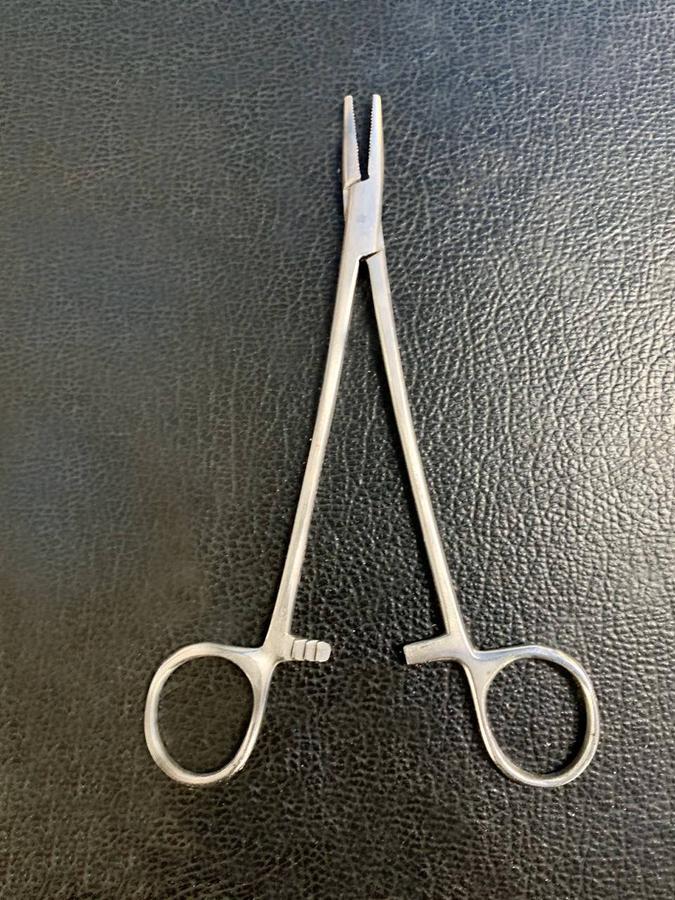
Mayo-Hegar are similar, but without the cutting edge (Figure 22).
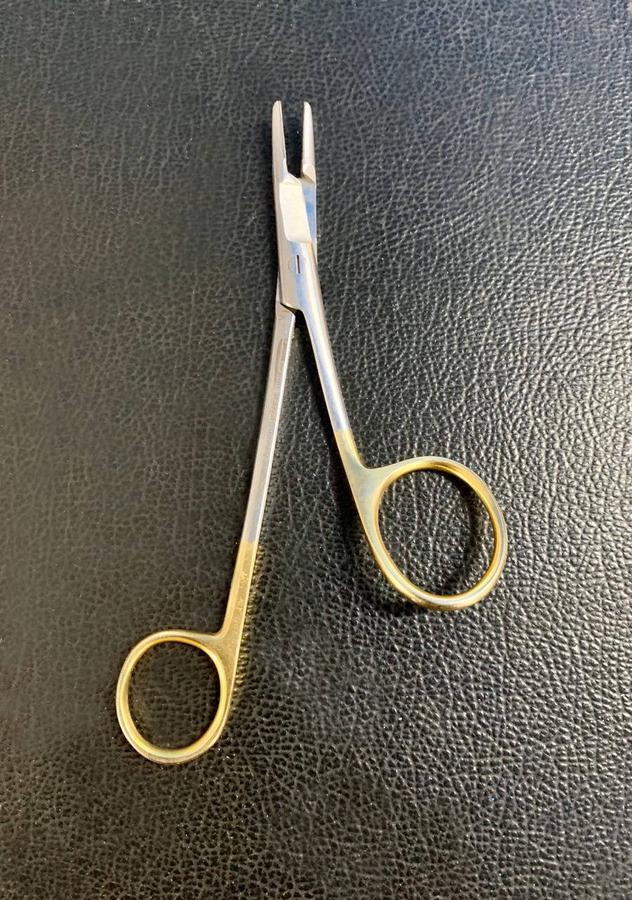
Gillies have a large thumb grip set at an angle to the other finger grip (Figure 23). A cutting edge is incorporated into the jaws, but no ratchet. Because of the incorporated cutting edge, the pivot point for the blades is set further back with a loss of lever arm power when closing the jaws. They therefore require more finger pressure during use and can result in more surgeon fatigue.
McPhail has soft copper jaws for extra needle grip (Figure 24). There is a catch that engages when the handle is squeezed gently. By applying further pressure, the the catch and the needle are then released.
Towel clips
Towel clips are used to hold drapes and skin towels in position (Figure 25). The most common type is the Backhaus towel clamp which incorporates a ratchet. When applied, the sharp points penetrate the drape and the skin. These clamps should therefore not be removed and re-applied as this action could transfer skin organisms to the sterile field. The Jones towel clamps have a spring grip. They usually do not penetrate the drape or the skin, but caution should still be taken to avoid repositioning.
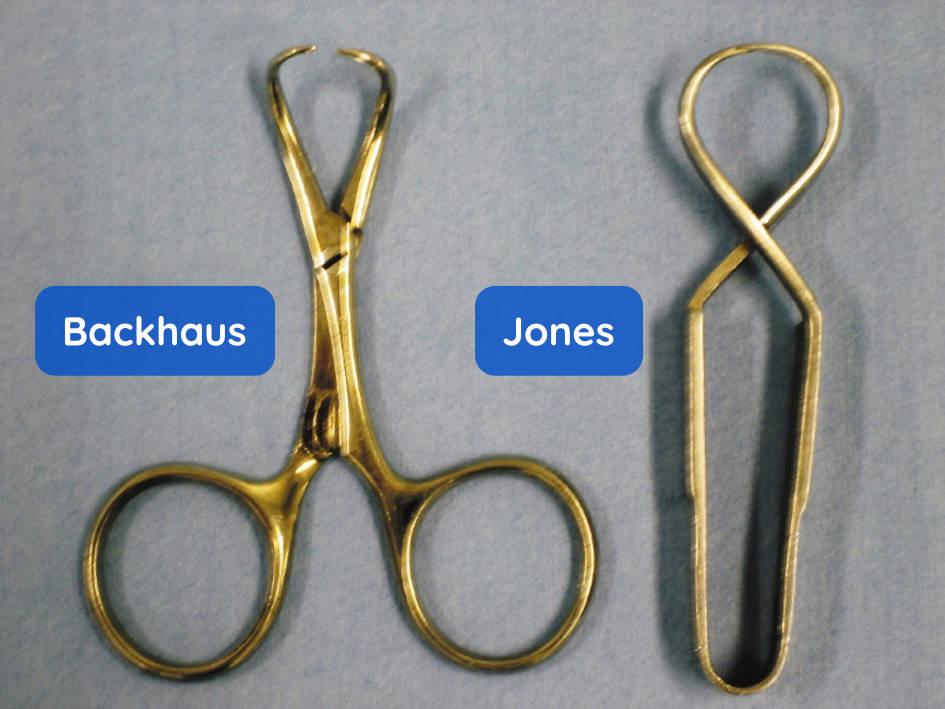
Photo credit - © BSAVA. Reproduced with permission from the BSAVA Manual of Canine and Feline Surgical Principles.
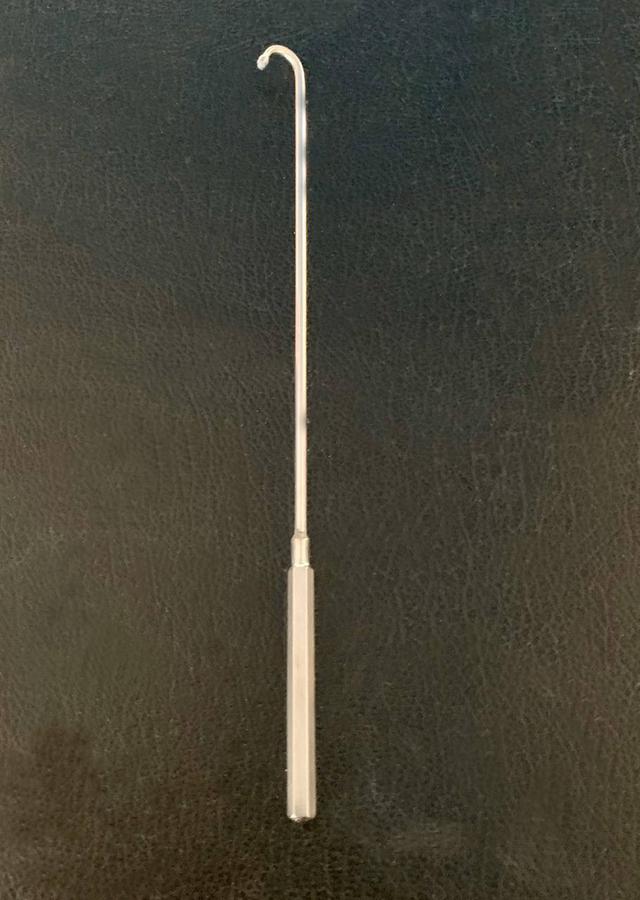
Spay hooks
These are blunt-ended hooks that can be used to elevate the horn of the uterus or uterine ligament through a key-hole abdominal wall incision (Figure 26). They can also be useful as a retractor.