

The process of surgical scrubbing is critical in reducing the incidence of surgical site infections. It minimises the number of bacteria that reside in the skin and, by doing so, makes it less likely for an infection to establish once the surgical incision has been created.
There are two major groups of microorganisms that can be found:
Transient flora. These do not normally reside on the skin, but are acquired through contact with other animals, people or the environment. These are generally easily removed from the skin surface by aseptic techniques.
Resident flora. These are found colonising the skin, and act as a protective barrier against invasion by more pathogenic bacteria. Around one fifth live deep in the epidermis, and are not removed by aspetic techniques.
Resident flora. These are found colonising the skin, and act as a protective barrier against invasion by more pathogenic bacteria. Around one fifth live deep in the epidermis, and are not removed by aspetic techniques.
This initial procedure is performed in the preparation room, with a final application of antiseptic solution once the patient has been transferred to the operating table. If, at any point in the transferring of the patient the cleaned surgical site is touched and asepsis compromised, this area should be re-cleaned.
Rebound growth of bacteria occurs after an area of skin has been disinfected; therefore, skin preparation should occur just prior to the start of surgery to prevent this from occurring.
Surgical scrub solutions
Solutions that contain a detergent should only be used for cleaning intact skin, such as surgical sites or surgeons' hands. This is because the detergent can be toxic to open wounds, resulting in tissue damage.
Examples of solutions that are used in the surgical scrubbing process are:
Chlorhexidine gluconate 4% scrub solution. (e.g."Hibiscrub") (Figure 1). Used for scrubbing.
Chlorhexidine gluconate concentrated solution. For mixing with alcohol for rinsing.
Povidone-iodine 7.5% scrub solution (other concentrations are available). Used for scrubbing.
Povidone-iodine 7.5 - 12% solution. Used for rinsing (undiluted).
70% alcohol e.g. IPA, methylated spirits. Used for rinsing.
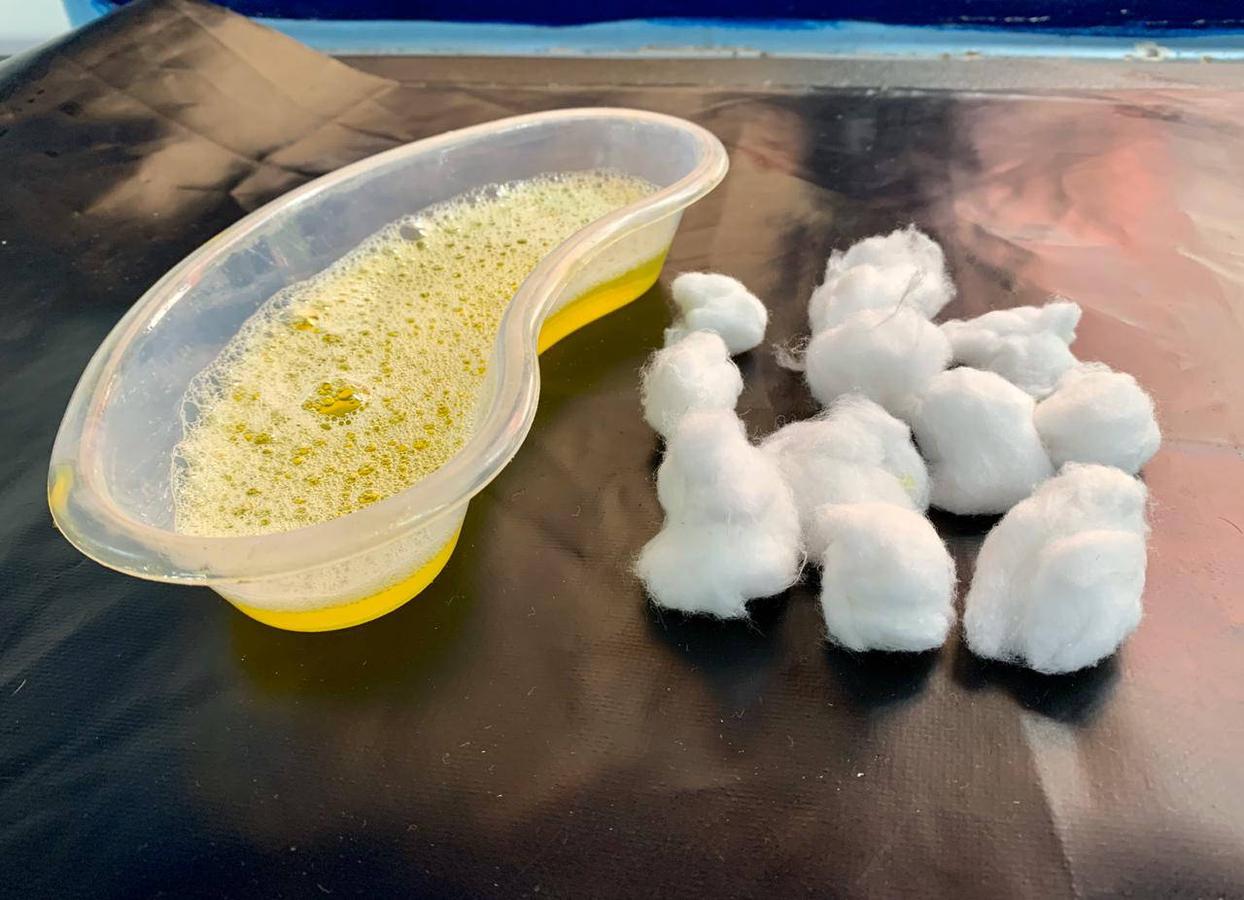
Only one antiseptic solution should be made up in a sterile bowl; different ones should not be used on the same patient as iodine can inactivate chlorhexidine, resulting in a reduction in antiseptic effect 3, 4, 5, 6. Ensure that the manufacturer's instructions for dilution are followed; some solutions are ready to use and don't require diluting, for example, chlorhexidine 4% scrub can be diluted 50:50; always use warm water. If the solution is too dilute, it will have reduced antiseptic effect.
In some countries, surgical scrub solutions are not easily available. In this case, add a small amount of basic liquid soap to a diluted antiseptic solution and mix well.
Contact time
Contact time is the minimum time required for the antiseptic to exert its full effect on the skin. This can vary between products; therefore, check the manufacturer's instructions carefully.
In general, the contact time for chlorhexidine is 5 minutes, and is longer for povidone-iodine.
Residual effect
This refers to the ability of the solution to retain its microbial killing activity over a period of time, once it has been applied to the skin. Chlorhexidine gluconate has a longer residual effect than povidone-iodine.
Adverse effects
The use of povidone iodine results in a higher incidence of acute, contact dermatitis, as compared to chlorhexidine gluconate7.
Whichever antiseptic you decide to use, they are safe and effective for pre-operative preparation if used correctly.
Initial scrub
Traditionally, the 'circular' technique for preparing the surgical site has been used. In the last few years, there has been a shift to using the 'back and forth' technique. Both methods are different in their approach; the 'circular' technique varies movement over a wider area, whereas the basis for the 'back and forth' technique is the application of repetitive movement at the incision site, followed by cleaning of the periphery. There is some evidence to suggest that the 'back and forth' technique is more effective at reaching bacteria that reside in the deeper layers of the skin. However, conclusive evidence for which method is best is lacking, and larger scale, veterinary studies are required7. Nevertheless, many medical and veterinary facilities are choosing to use the 'back and forth' method.
Both methods will be described below; whichever you use, be consistent and thorough with your approach in order to create and maintain an asesptic environment, and use non-sterile gloves in order to reduce the risk of contamination from the operator's hands.
'Back and forth' method
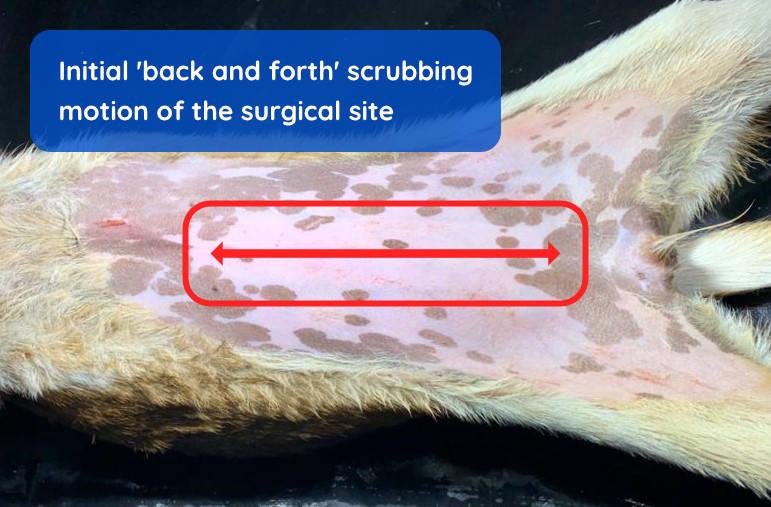
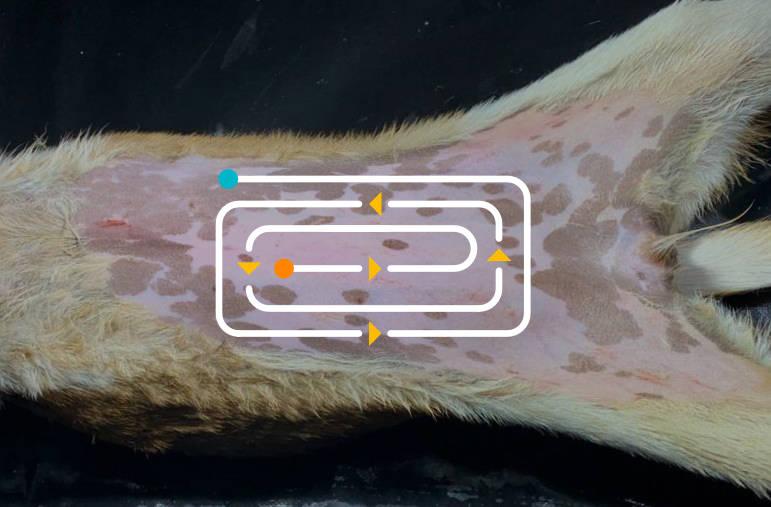
Apply the antiseptic. The surgical site is prepared by moving the swab up and down along the incision site so that it repeatedly contacts the skin with a frictional effect (Figure 2).
A side to side motion is then used briefly (Figure 3).
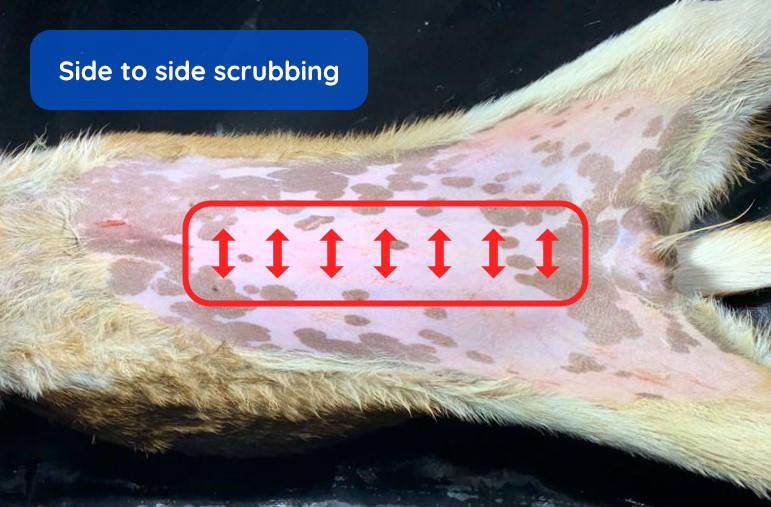
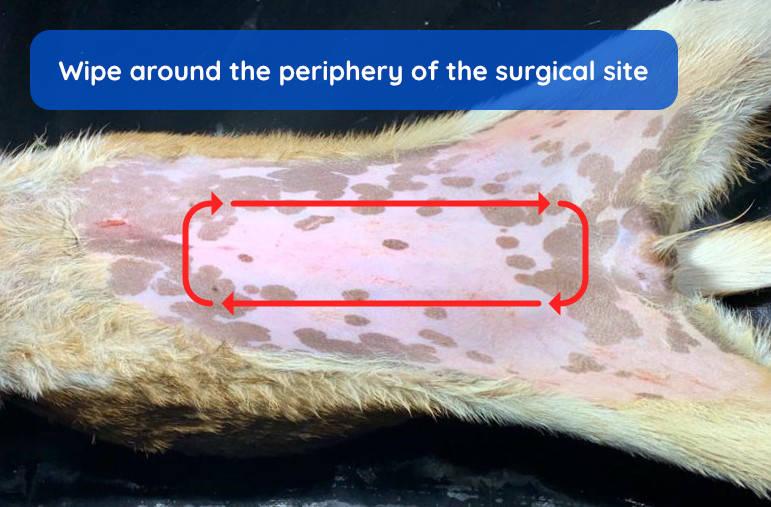
Repeat. Both these movements are repeated. Continue these processes for at least 2 minutes (the swab or cotton wool should be visibly clean by this point). The remaining skin around the surgical site is then wiped with a fresh swab, without touching the central area (Figure 4).
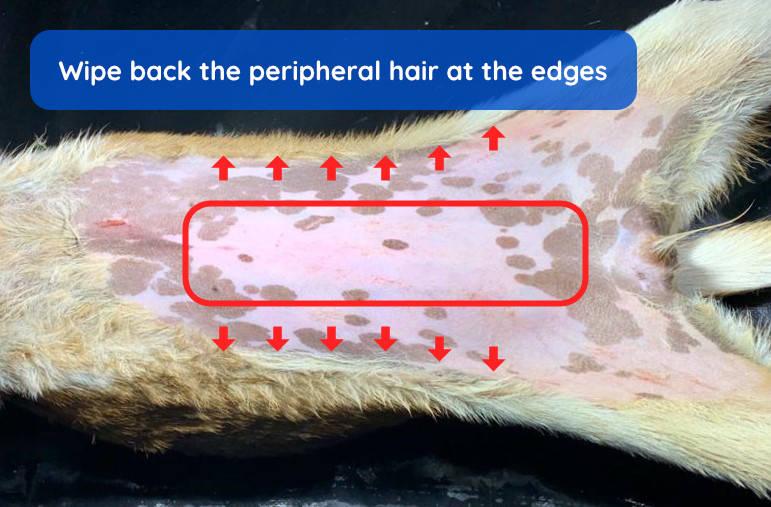
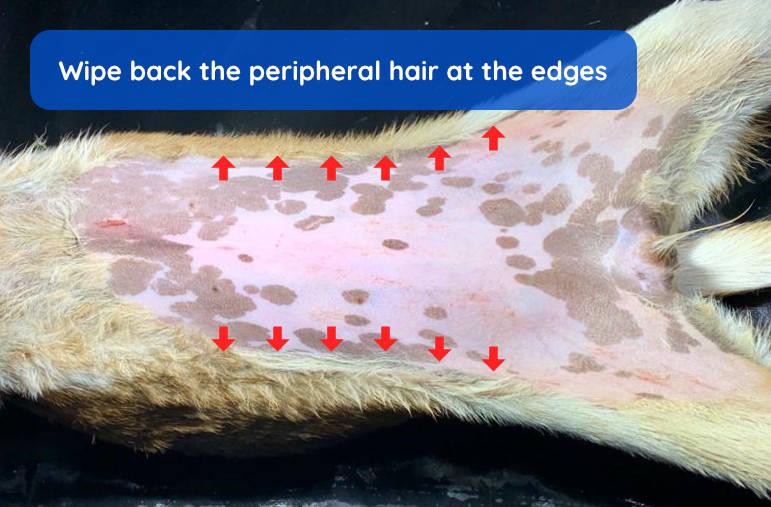
Hair edges. Lastly, the hair at the edges is then dampened down and wiped away from the site to reduce the likelihood of contact with the skin, and then the swab is discarded (Figure 5).
Circular method
Apply the antiseptic. Using a swab of lint-free gauze (or cotton wool), start at the intended site of incision, and move in a spiral motion, slowly progressing outwards (Figure 6). Both the lather produced and the scrubbing action are important in the cleaning process. Do not use excessive volumes of antiseptic solution as this can result in excessive wetting of the patient, predisposing them to hypothermia.
Discard the swab. Once the haired area at the periphery is contacted, do not return to the centre. The swab or cotton wool should now be discarded and a new piece used.
Repeat the process. Continue this process for at least 2 minutes (the swab or cotton wool should be visibly clean by this point). Excess lather may be removed with a dry swab or cotton wool.
Hair edges. Lastly, the hair at the edges is then dampened down and wiped away from the site in order to reduce the likelihood of contact with the skin; the swab is then discarded (Figure 7).
Second scrub
The patient is then transferred to the operation table taking care to avoid touching the cleaned site (Figure 8).
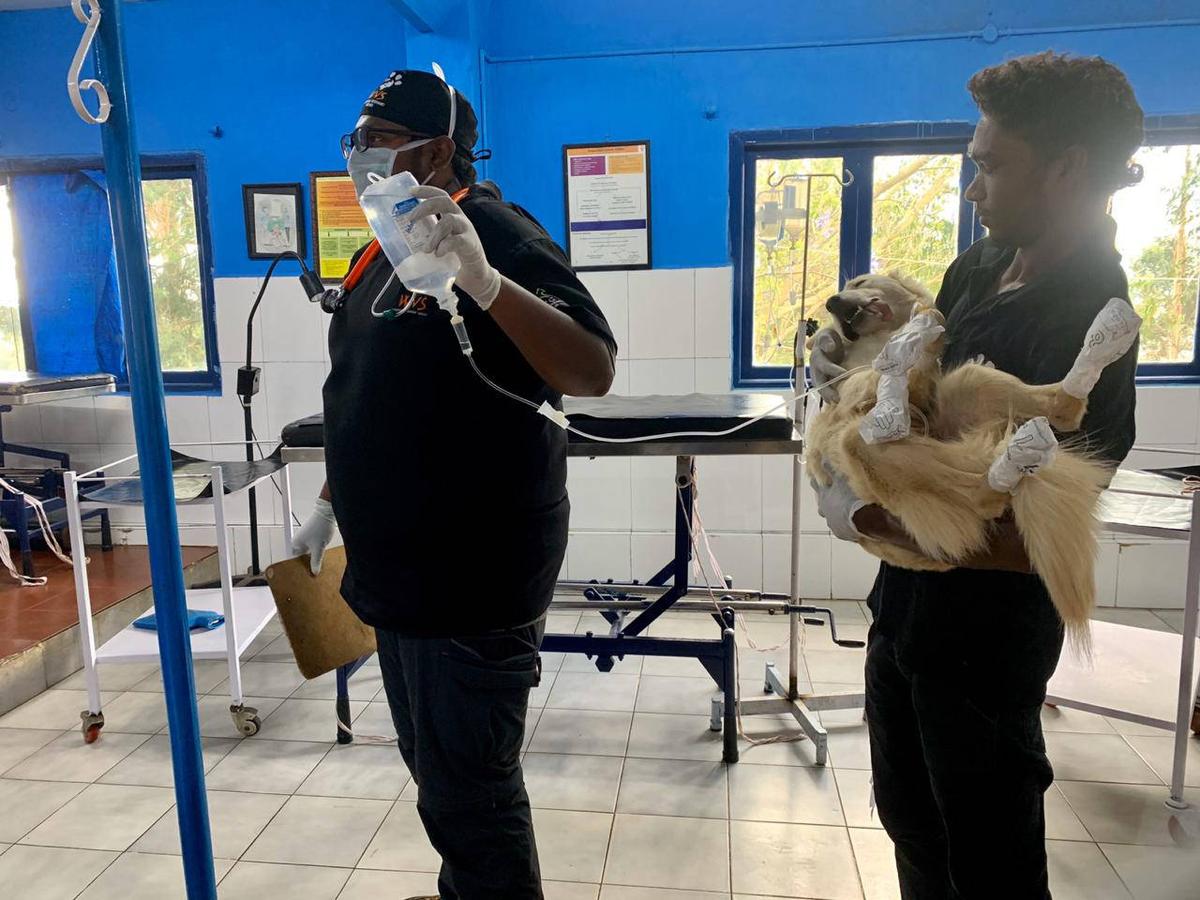
The patient is then positioned for surgery. During the transfer and positioning processes, there is a risk that the site may have been contaminated; therefore, the skin should be cleaned again once in the same manner as described above. Use lint-free swabs and avoid cotton wool at this stage to prevent any fibres remaining on the skin.
Final rinse
The final step requires the use of solutions that do not contain detergents. Commonly, 70% alcohol is used which instantly kills any remaining surface microorganisms and removes residual detergent. The alcohol is often mixed with the antiseptic of choice (used in the scrubbing process).
Rinse solution can be applied by spraying in a spray bottle (Figure 9) or wiping with a swab (avoid cotton wool at this stage).
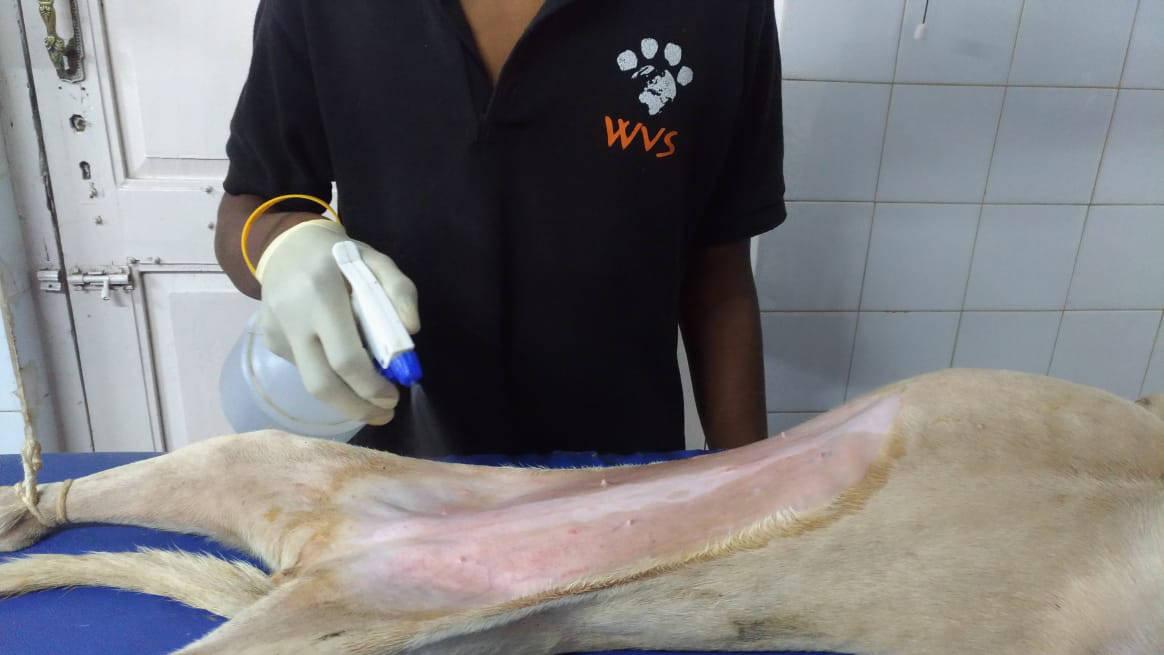
Remember, for this step, mix the alcohol with the concentrated form of the antiseptic solution and not the scrub solution.
Be aware that alcohol evaporates quickly which will lower body temperature considerably. Ensure that precautions have been taken to avoid hypothermia.
The surgical site is now ready for draping.