

Similar to the external examination, opening the carcass and assessment of the organs should be done systematically and in a logical order. For example, the alimentary tract is generally performed near the end of the examination to prevent contamination of gut contents.
Before you start, ask yourself:
- Am I concerned that the animal could have a serious zoonotic disease e.g. anthrax? — DO NOT proceed and seek expert advice.
- Do I have the right equipment?
- Am I using the correct PPE and have I considered all health and safety requirements?
- Do I have the swabs and tubes for sampling?
Limbs
The animal should be laid on its back. Initially it may need to be held in this position:
For the right axilla, cut down past the scapula so that the forelimb is only attached by the skin of the back (Figure 1). Repeat for the left axilla.

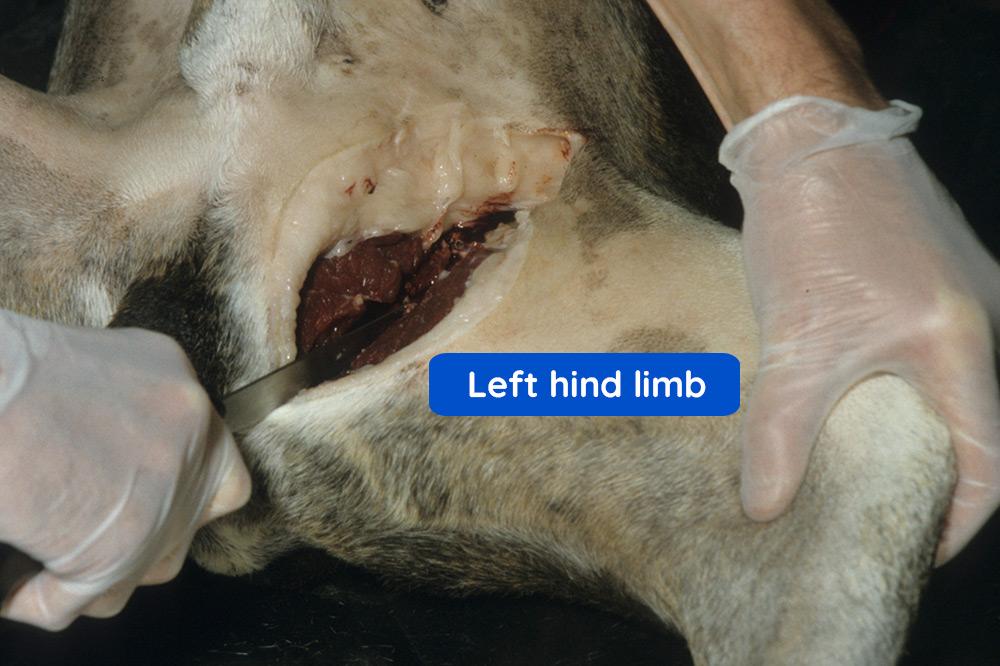
Next, make a deep cut into the inguinal area at the top of the left leg (groin), gently pushing the thigh down.
Why doesn't the limb lie flat against the table? Let's explore this below.
Assess both hip joints. Are there bony changes? For example, this could suggest osteoarthritis in an older animal, or hip dysplasia in a younger animal.
Once you have cut both teres ligaments, the hind limbs will lie flat.
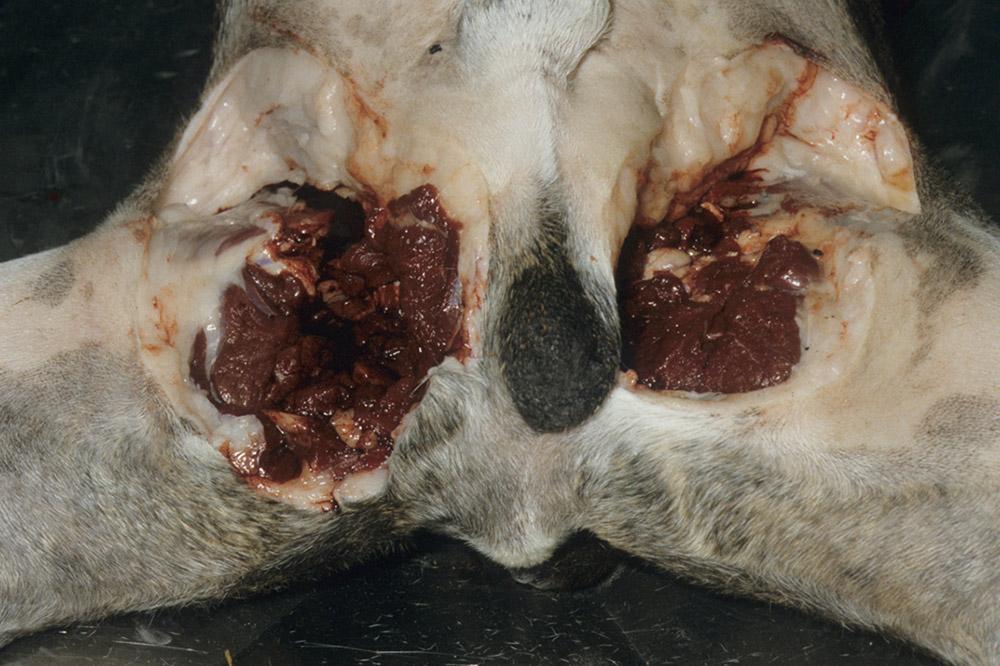
With the fore limbs and the hind limbs prepared in this way, the carcass will lie flat on the table.
Skin
Now return to the thorax. Starting at the axilla, pull on the skin and cut the fascia below the subcutis, from the thorax, caudally, along the lateral abdomen, to join up with the groin/inguinal incision. Repeat this on the other side.
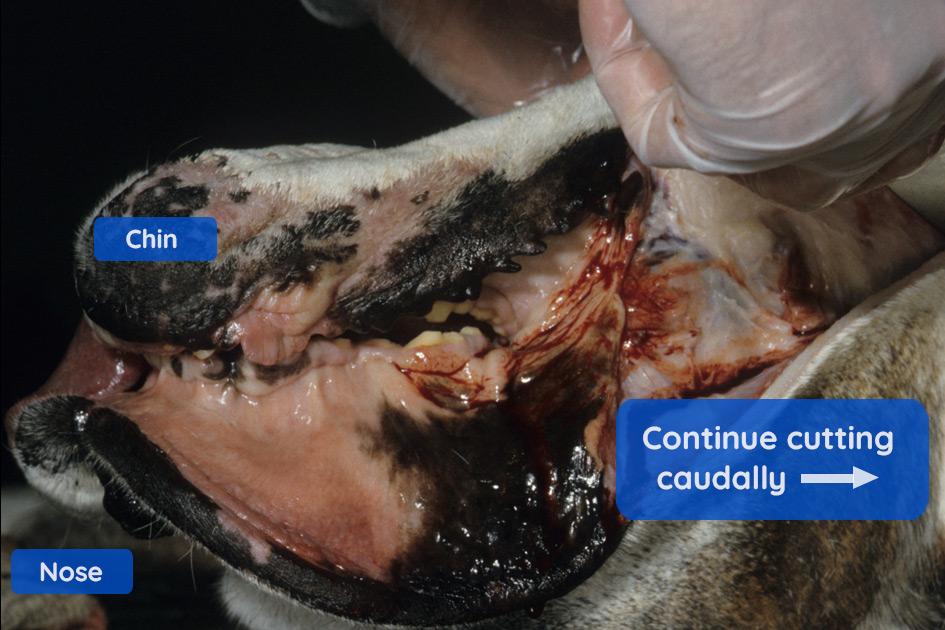
To remove the ventral cervical, and remaining ventral thoracic and abdominal skin, start with the oral cavity. The image below shows the right side of the oral cavity. Lift the upper lip.
Continue to cut in a caudal direction to the level of the thoracic inlet.
When you are cutting, be careful to leave the muscle and underlying structures intact, and only remove the skin. We will look at these structures shortly.
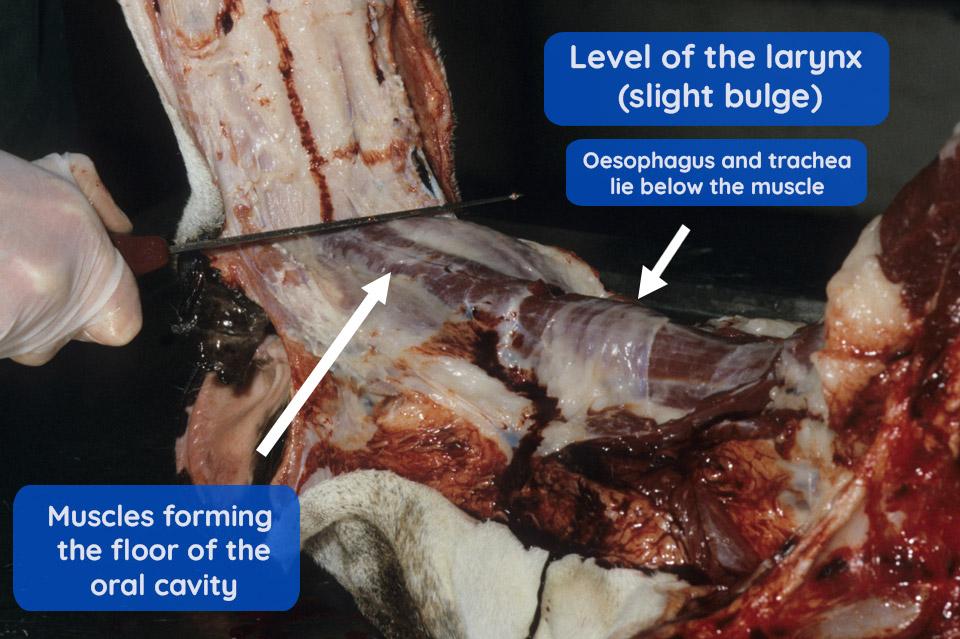
Next, cut across the strip of skin at the level of the thoracic inlet. Cut it back to the point of the jaw (red dotted line) then remove the skin.
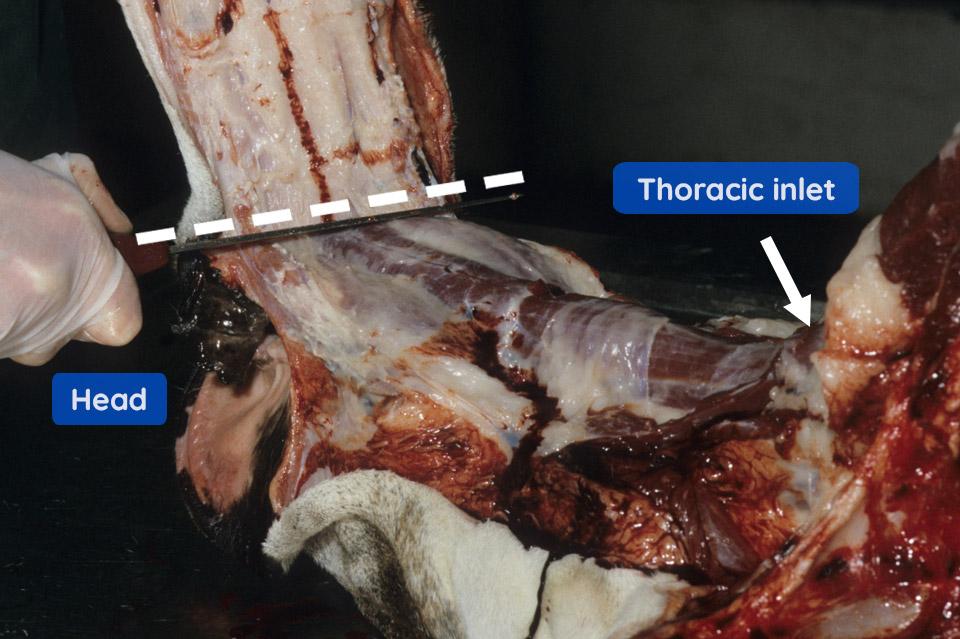
The structures now visible are the muscles forming the floor of the oral cavity and the underlying oesophagus, larynx and trachea, shown in the image below.
Next, lift the flap of skin at the level of the thoracic inlet. Cut carefully below the subcutaneous fat. As you cut the flap of skin as it continues over the abdomen, keep the knife blade pointed upwards, so that the ventral, abdominal muscle and the abdominal cavity are left intact.
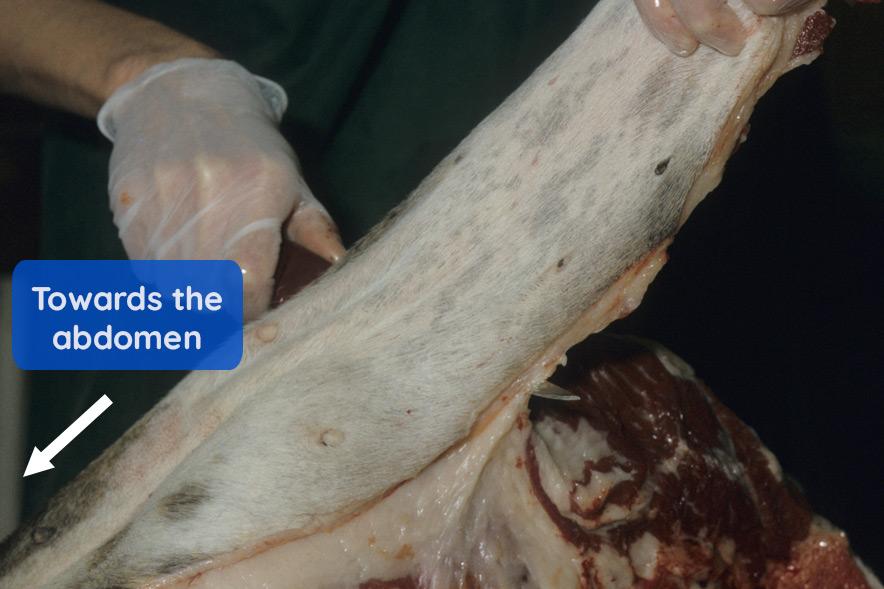
Cut across the ventral cervical, thoracic and abdominal skin 'flap' (blue arrow below), at the level of the pubis (yellow arrow). The mammary area, contained in the skin 'flap', can be examined in more detail later on.
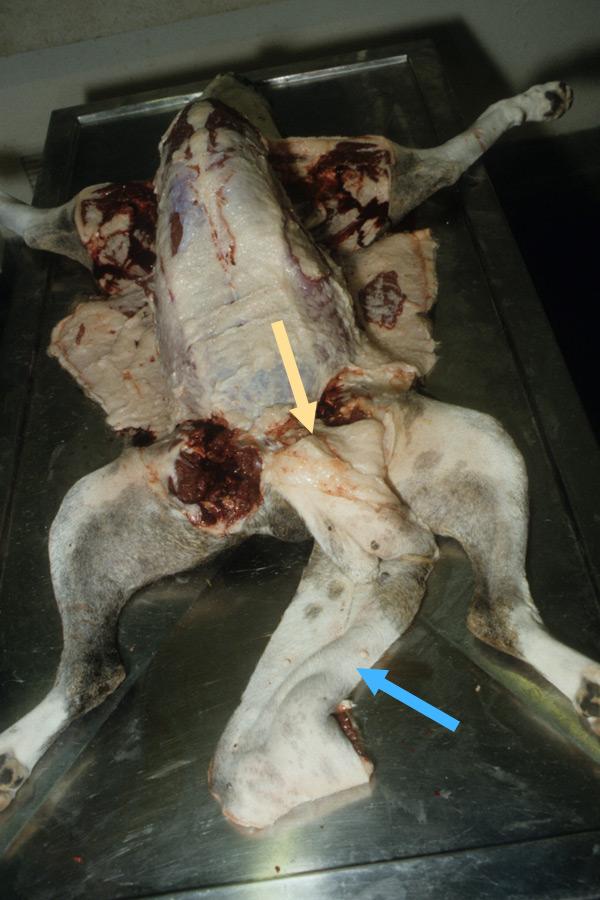
This leaves the cervical region, thorax and abdomen exposed but intact, ready to be opened for examination of the internal organs.